Tenant provisioning
This document assumes you have a tenant already created. As part of this documentation, the tenant we'll use is called test-chp-docs so wherever you see this, change it to your tenant.
Introduction
All of the following configurations are very important if we want the tenant we are configuring to work with the Consumer Health Platform (CHP) without any issues. The following steps ensure that the Sign In and Sign Up works according to the CHP standards.
Create API
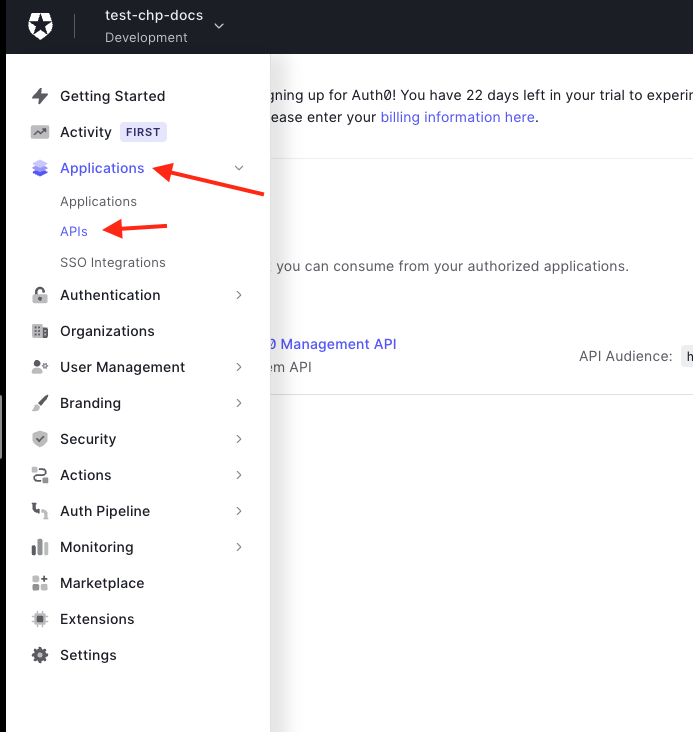
In order for the CHP API to communicate with the Auth0 tenant, we need to create an API inside Auth0 so that we can generate some API credentials. To do this, navigate to Applications > APIs.
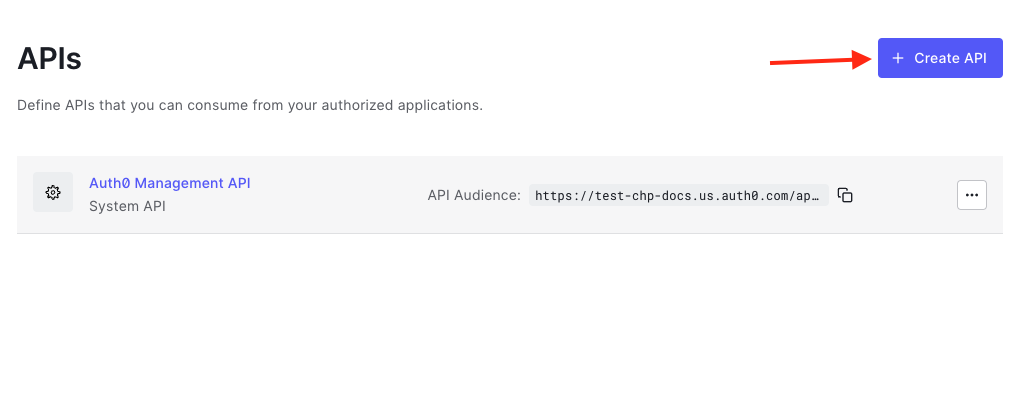
Click on Create API.
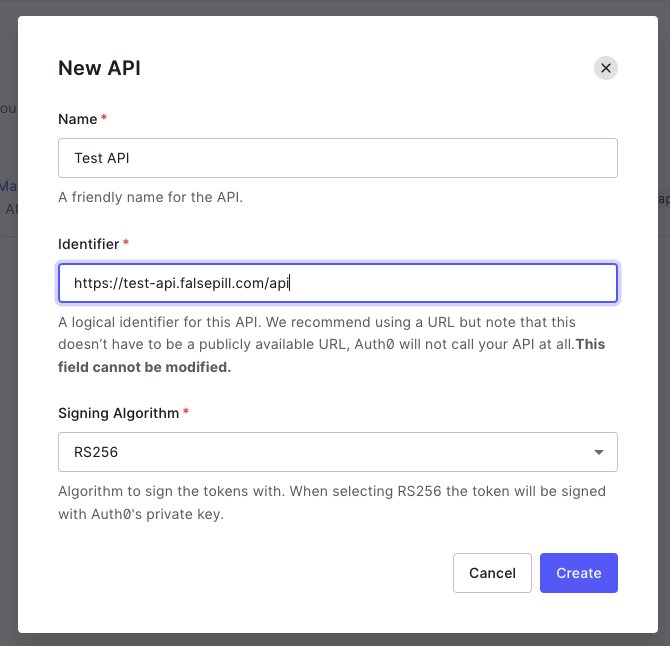
Name the API and fill in the URL of the API as the Identifier.
Create Applications
When creating an API, this will automatically create a Machine to Machine application with the same name. This application is the one we can use to communicate with Auth0 from the CHP API.
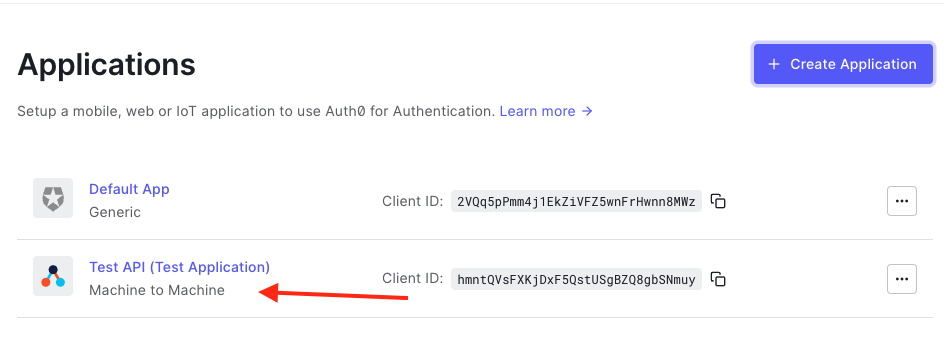
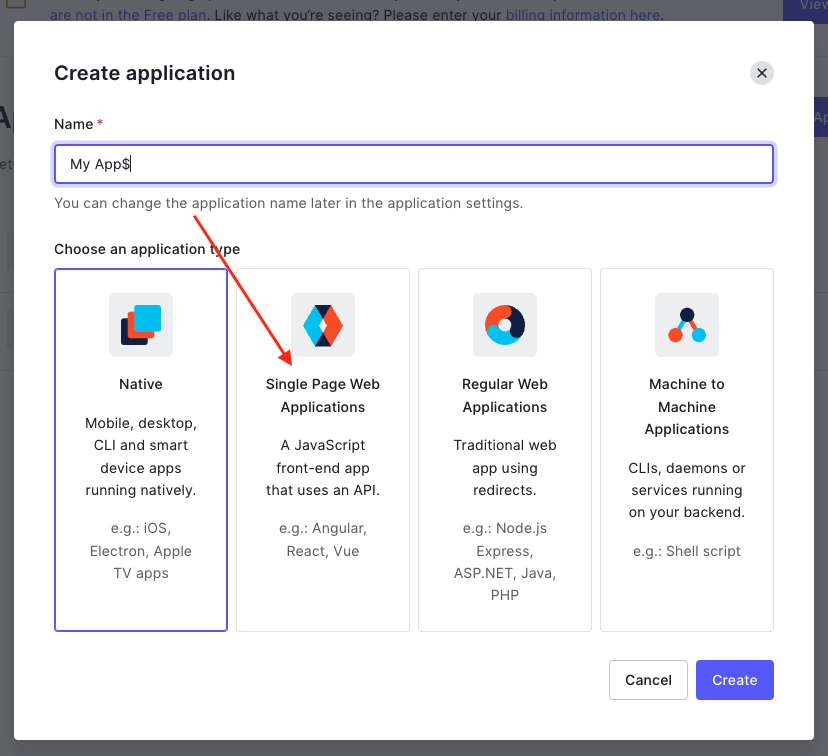
For other applications/APIs to be able to communicate with this tenant, you will need to create the required application in Auth0. To allow user log-in from a React app, create a Single Page Web Application.
Roles and Permissions
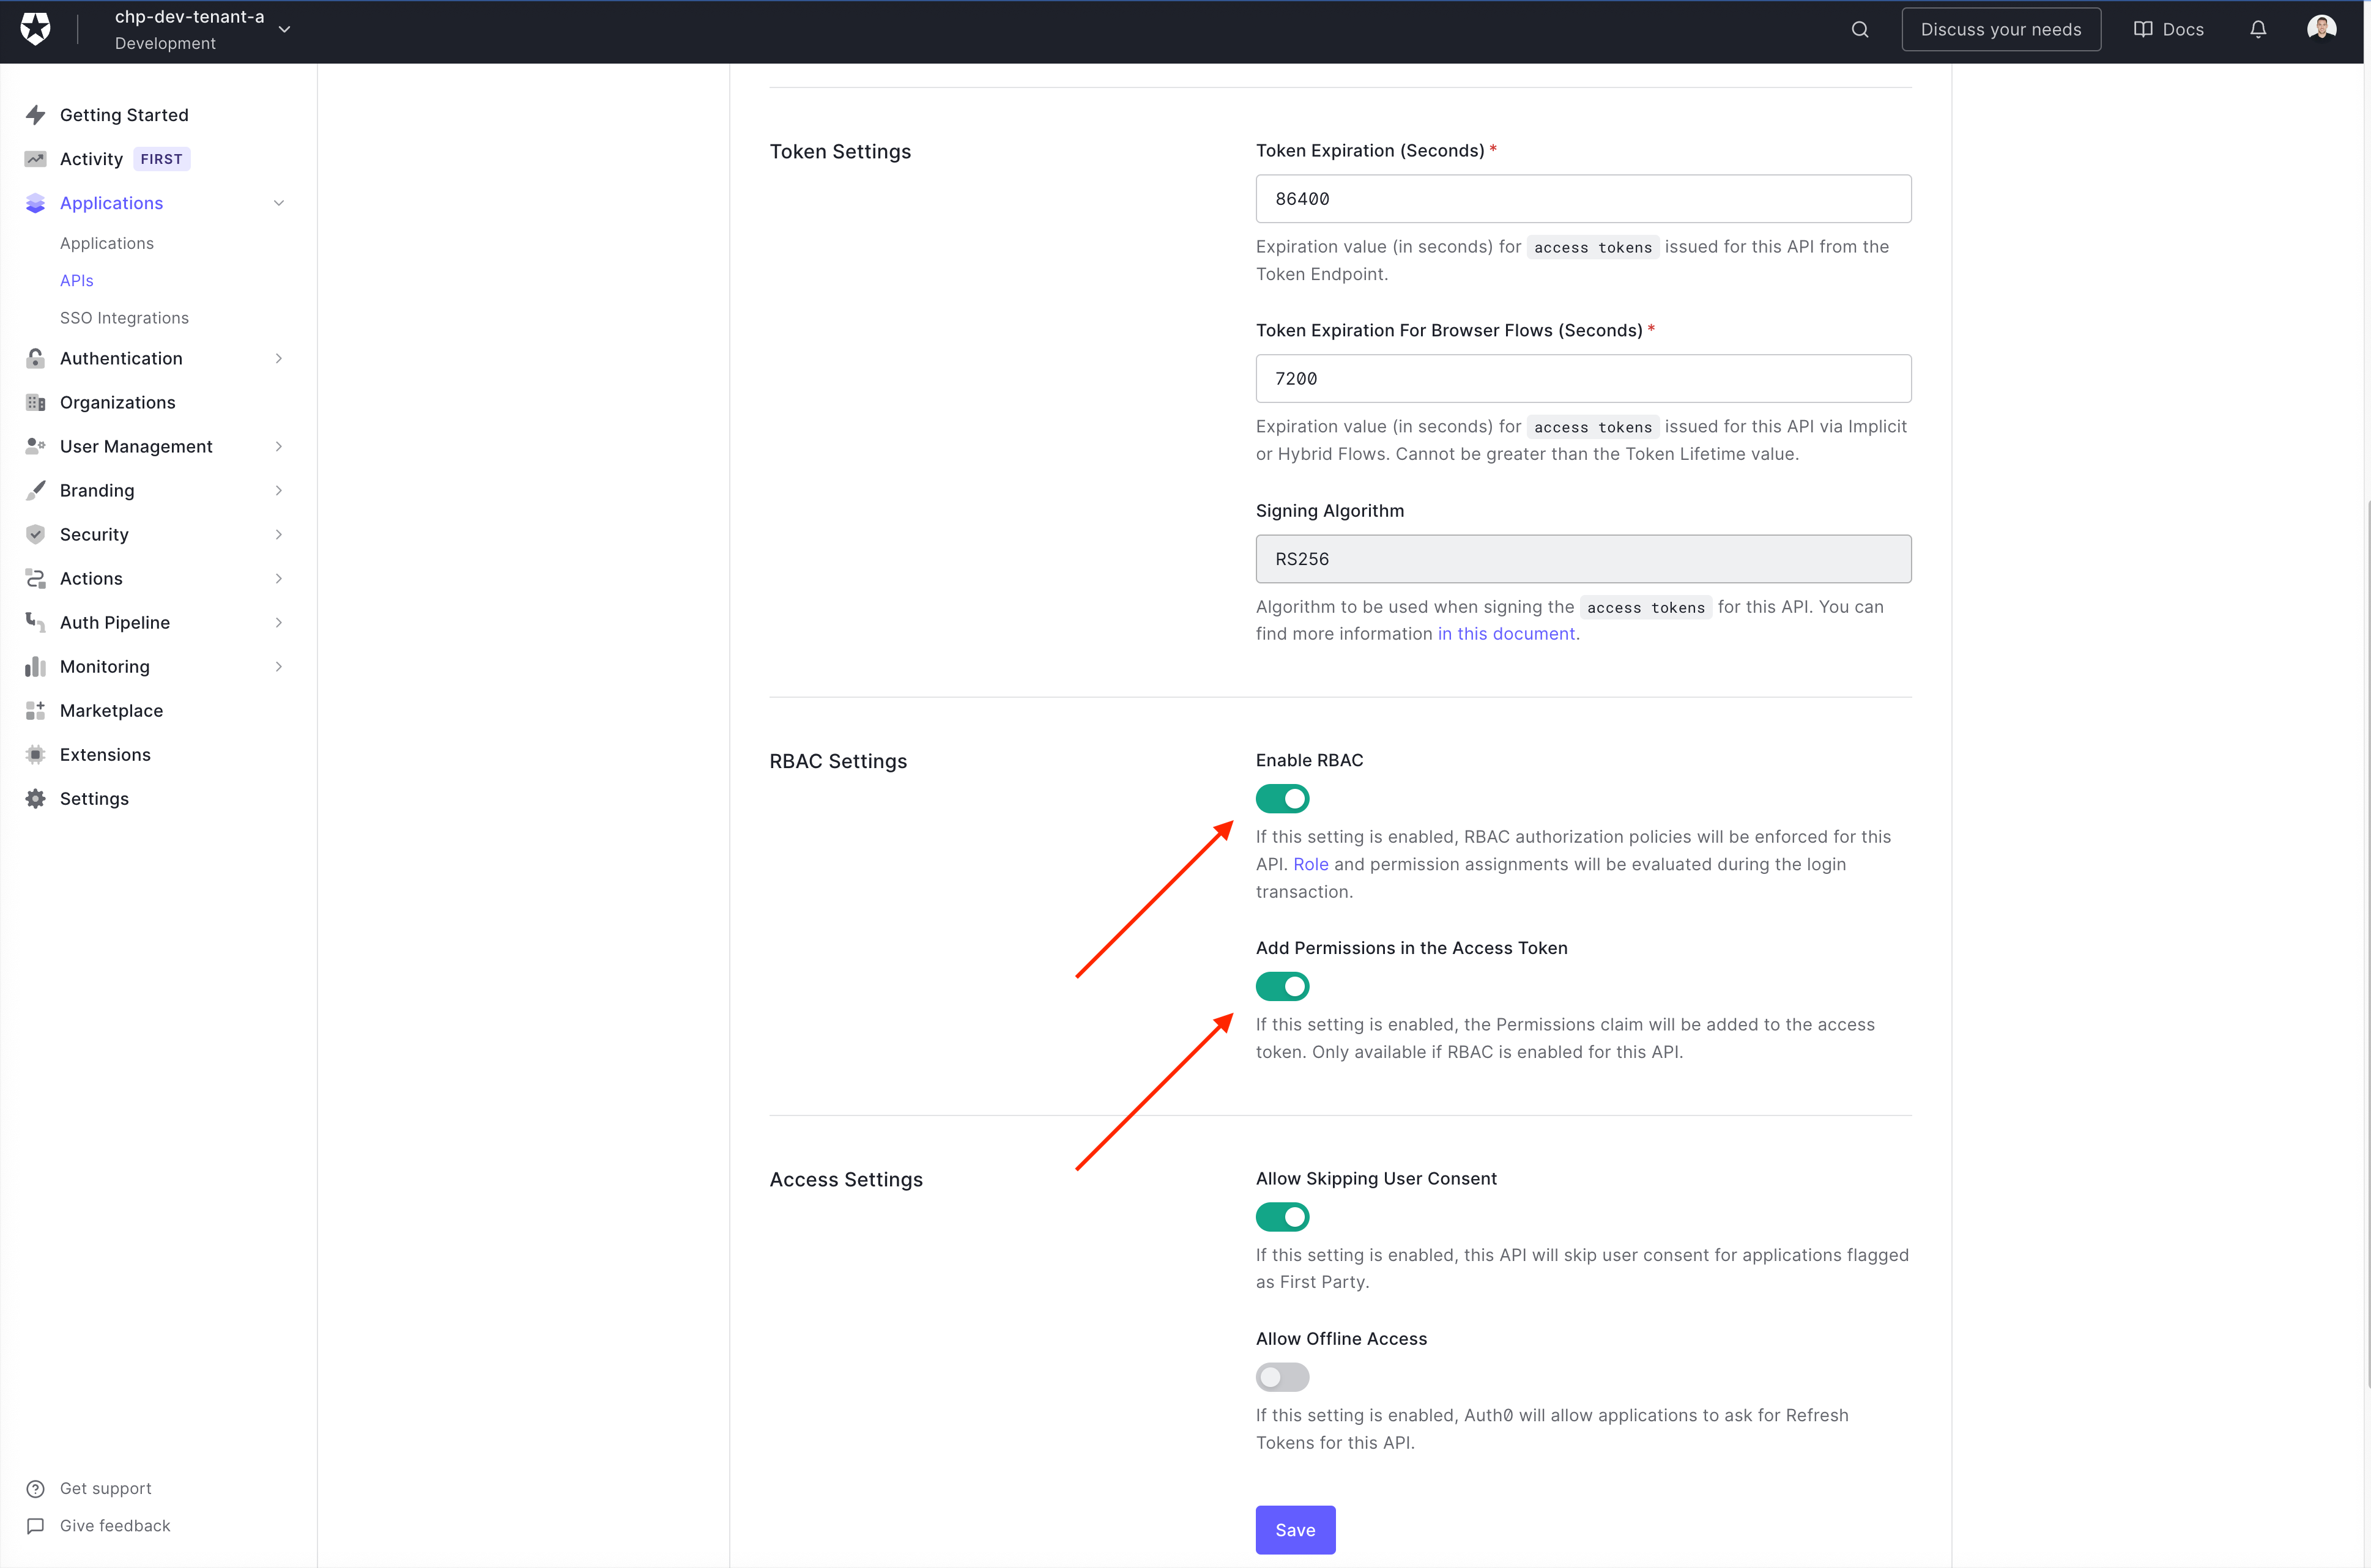
- To Enable Role-Based Access Control for APIs (Go to Dashboard > Applications > APIs and click the name of the API to view. - Scroll to RBAC Settings and enable the Enable RBAC toggle and Add Permissions in the Access Token)
Define Permissions
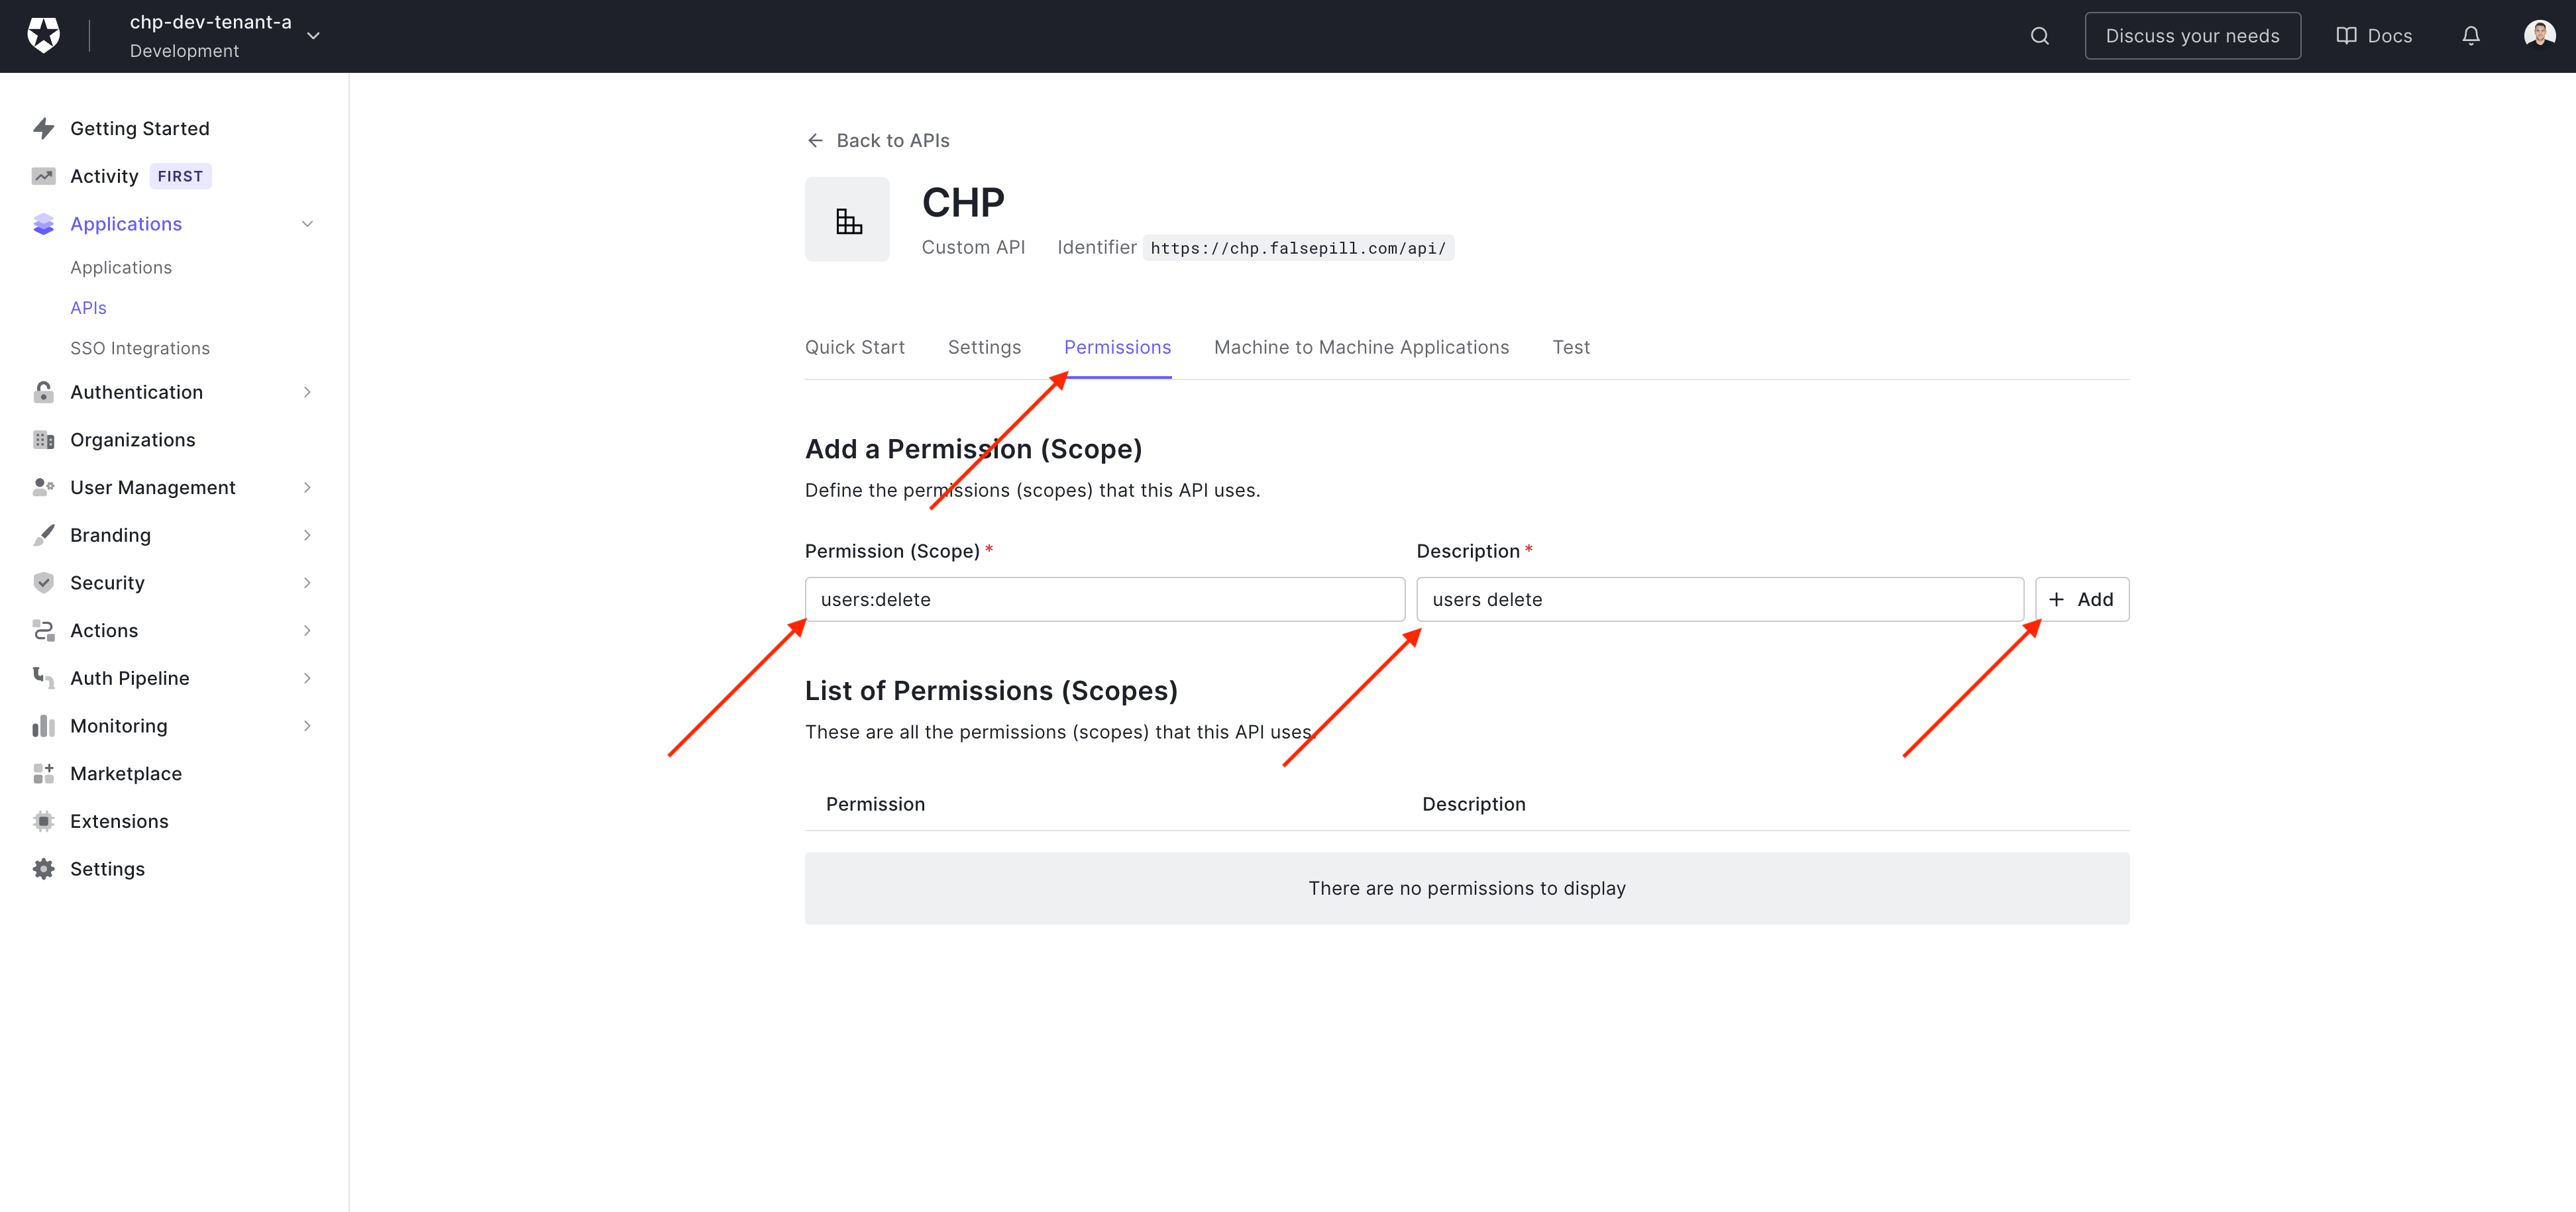
To define permissions (Go to Dashboard > Applications > APIs and click the name of the API to view. - Select the Permissions tab and add the permission)
Assign permissions to machine-to-machine clients
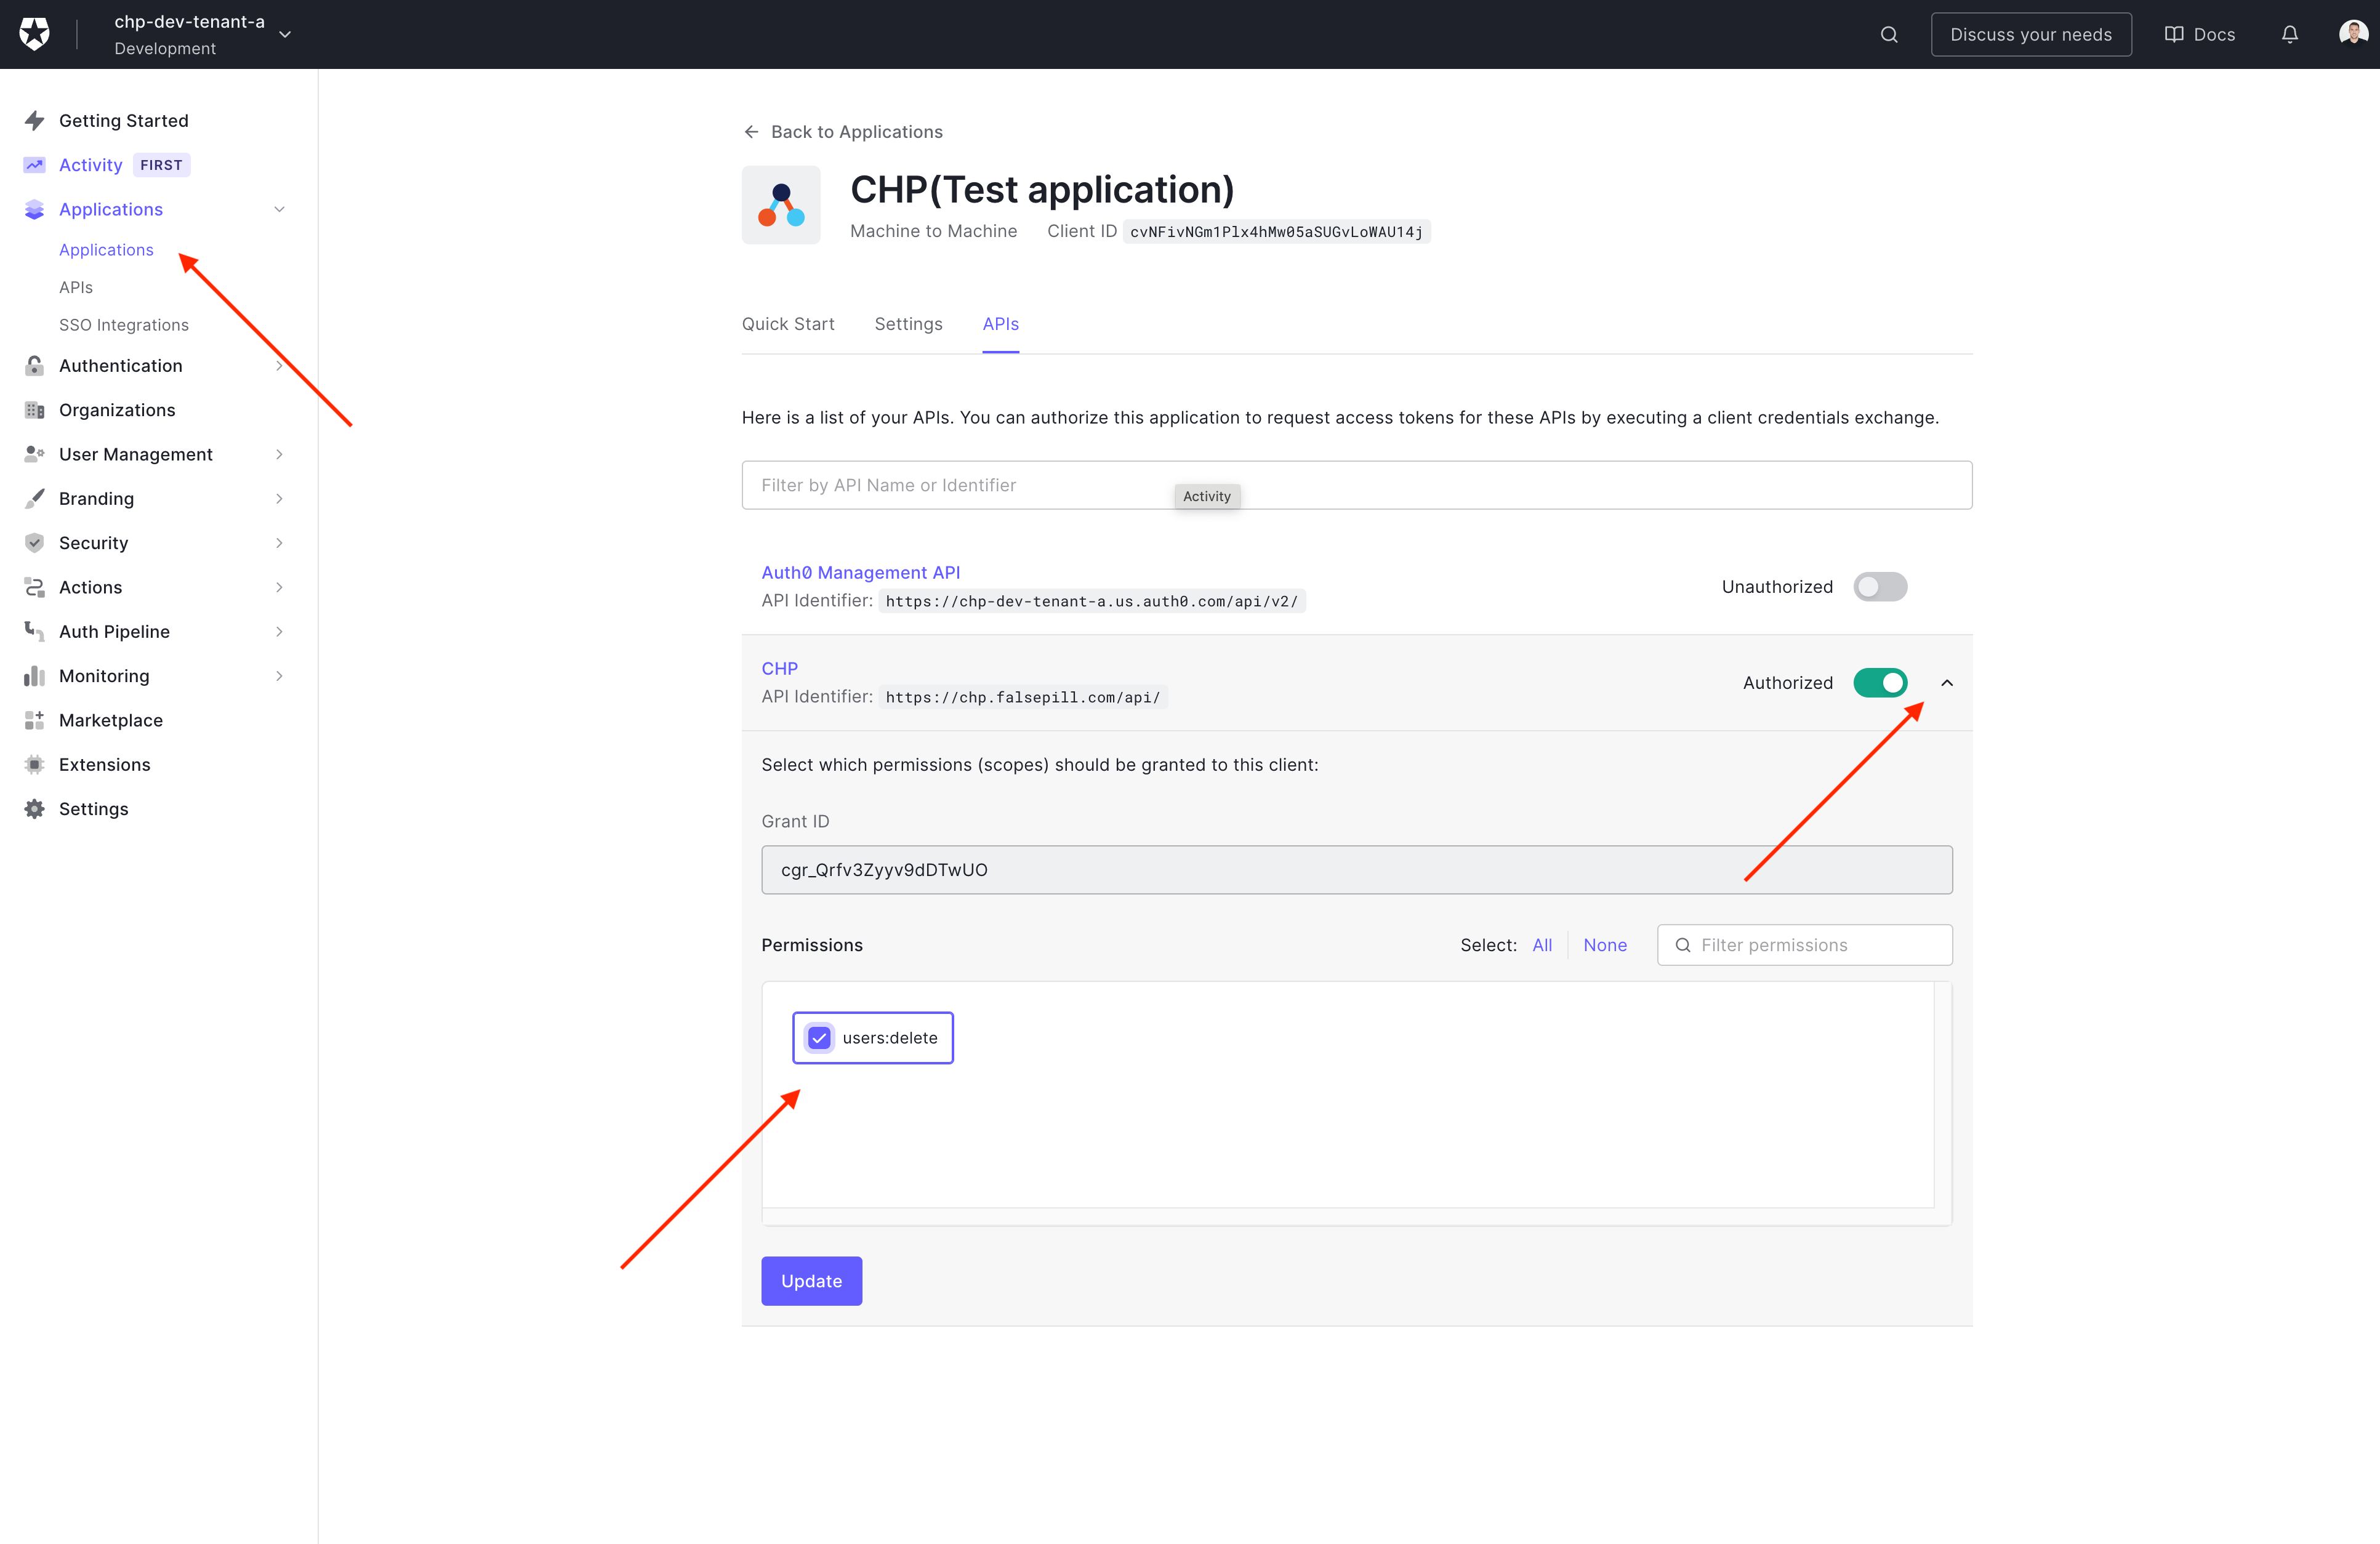
To assign a permission to a machine to machine Client (Go to Dashboard > Applications > APIs and click the name of the Application - Select the API tab and open the API dropdown. Select the permission required).
Create Roles
To create roles go (Go to Dashboard > User Management > Roles and click 'Create Role')
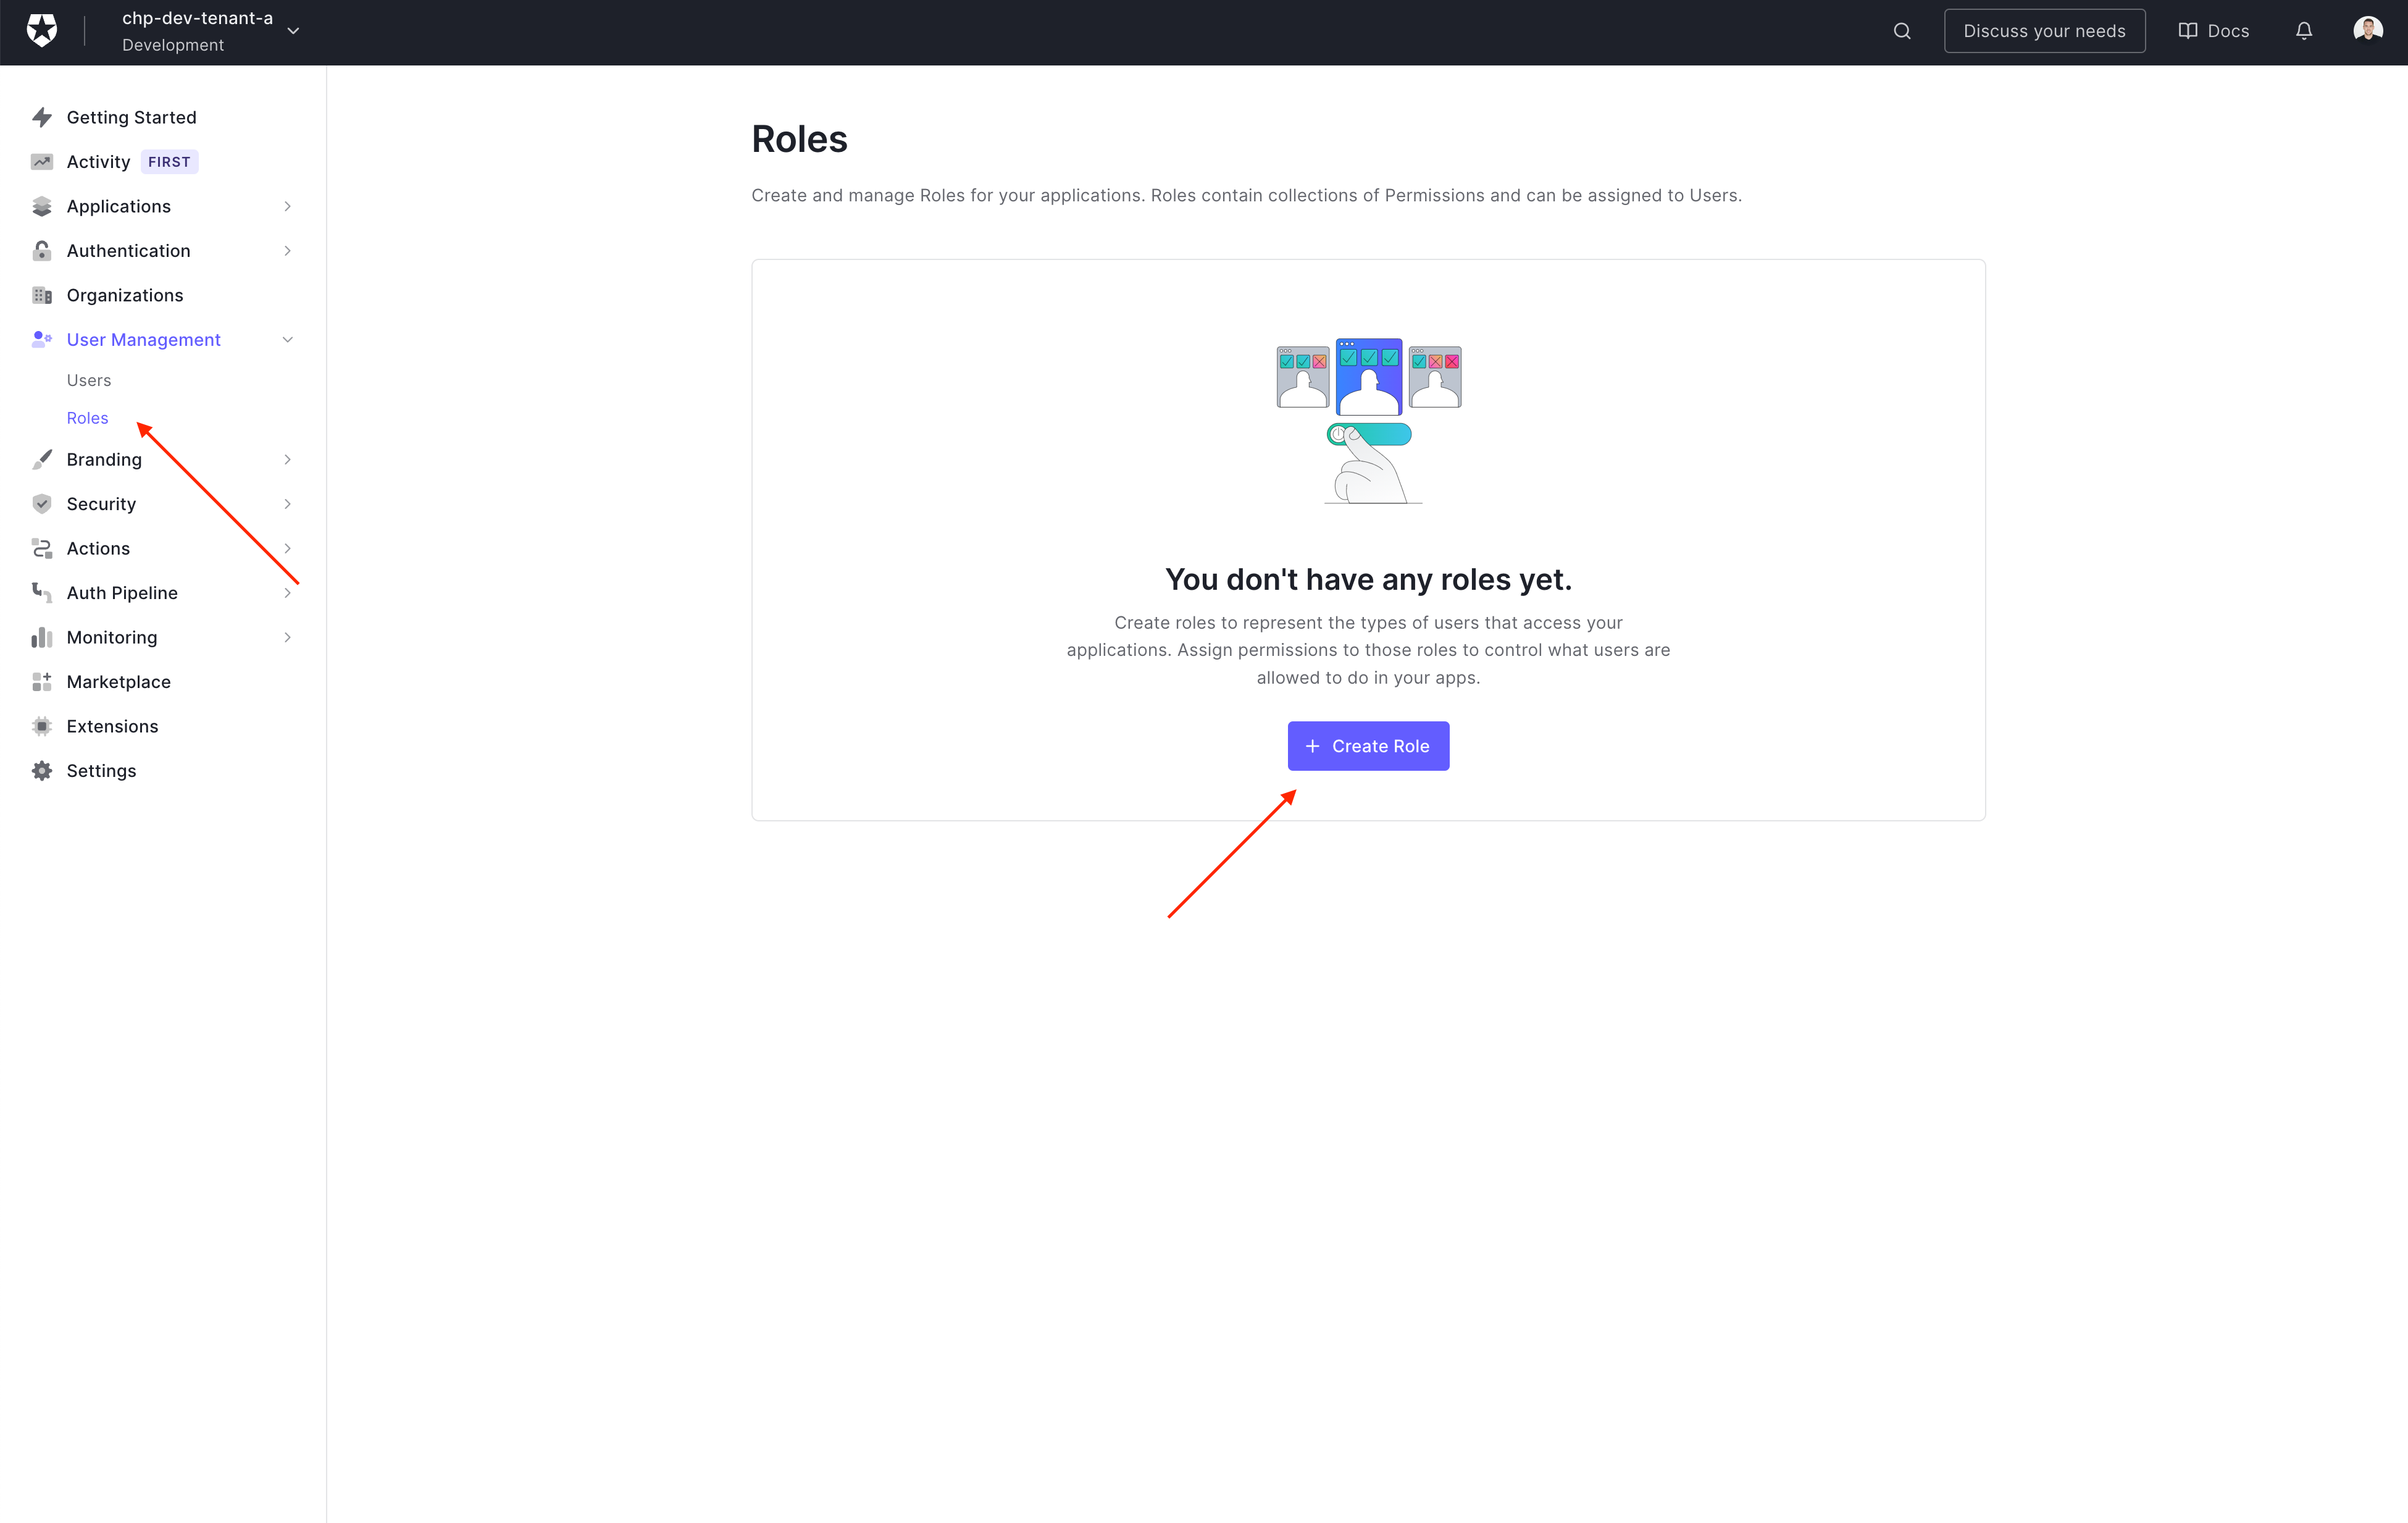
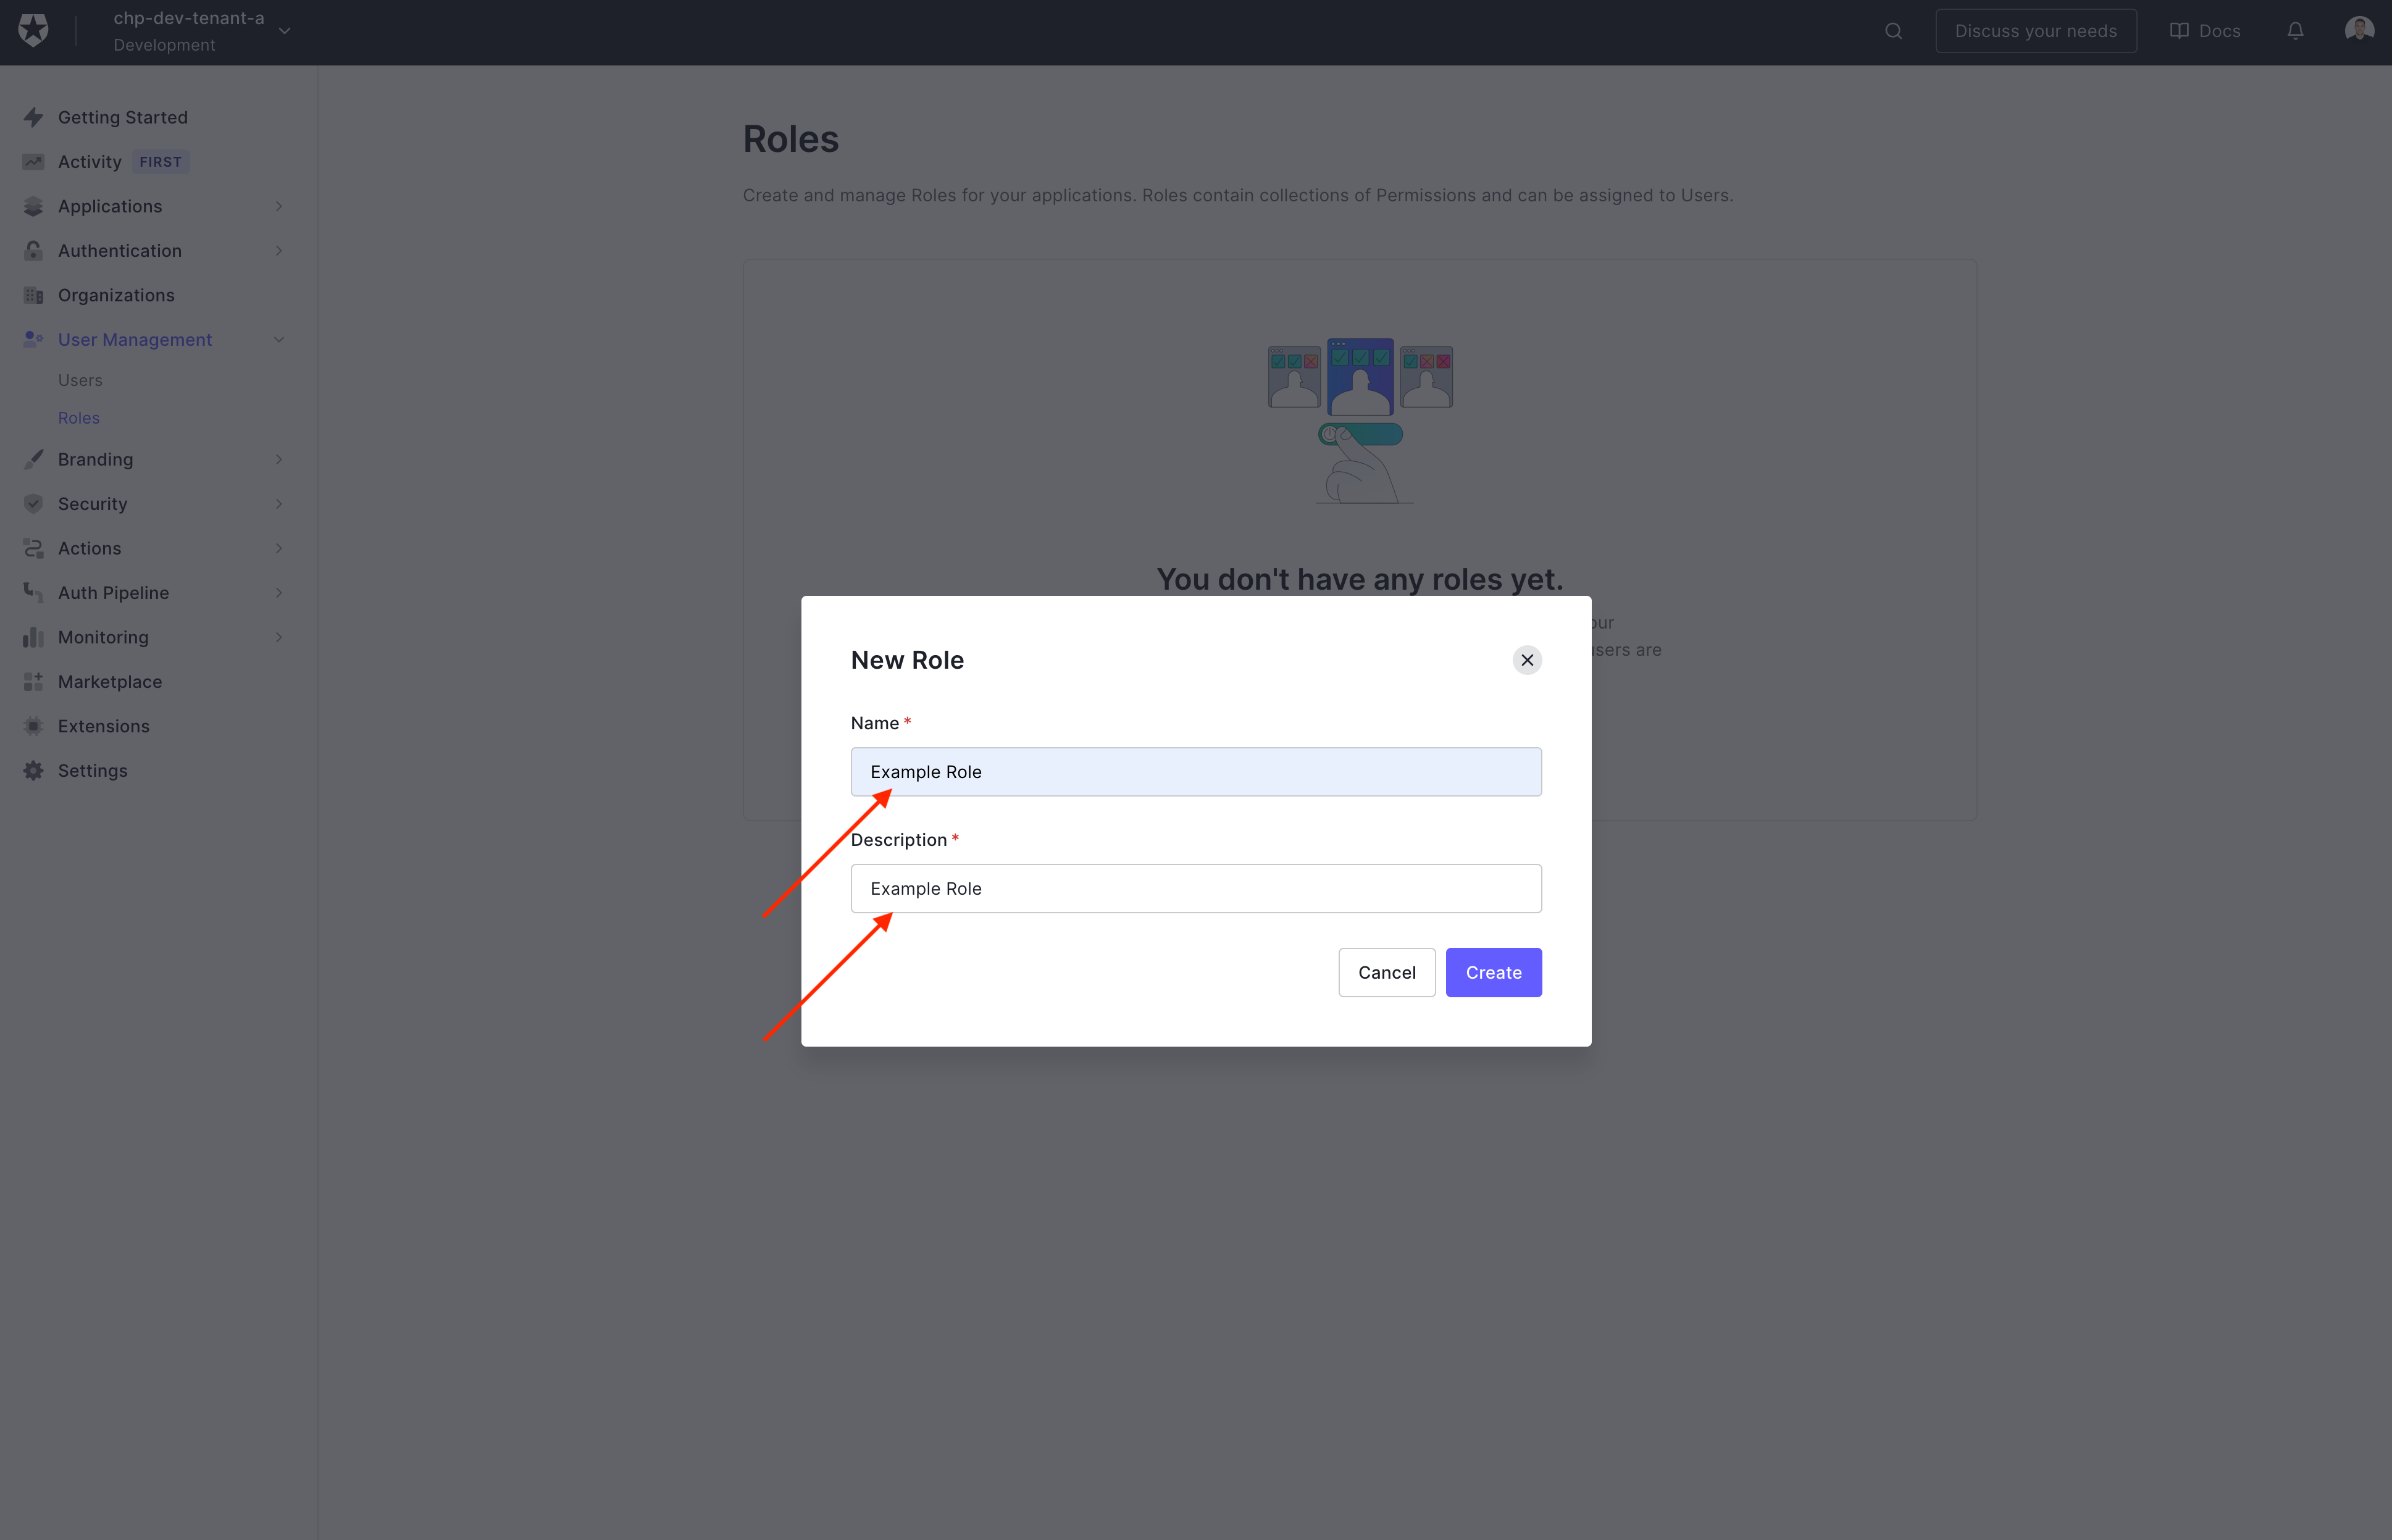
Add a name and description for the role, then click 'Create'
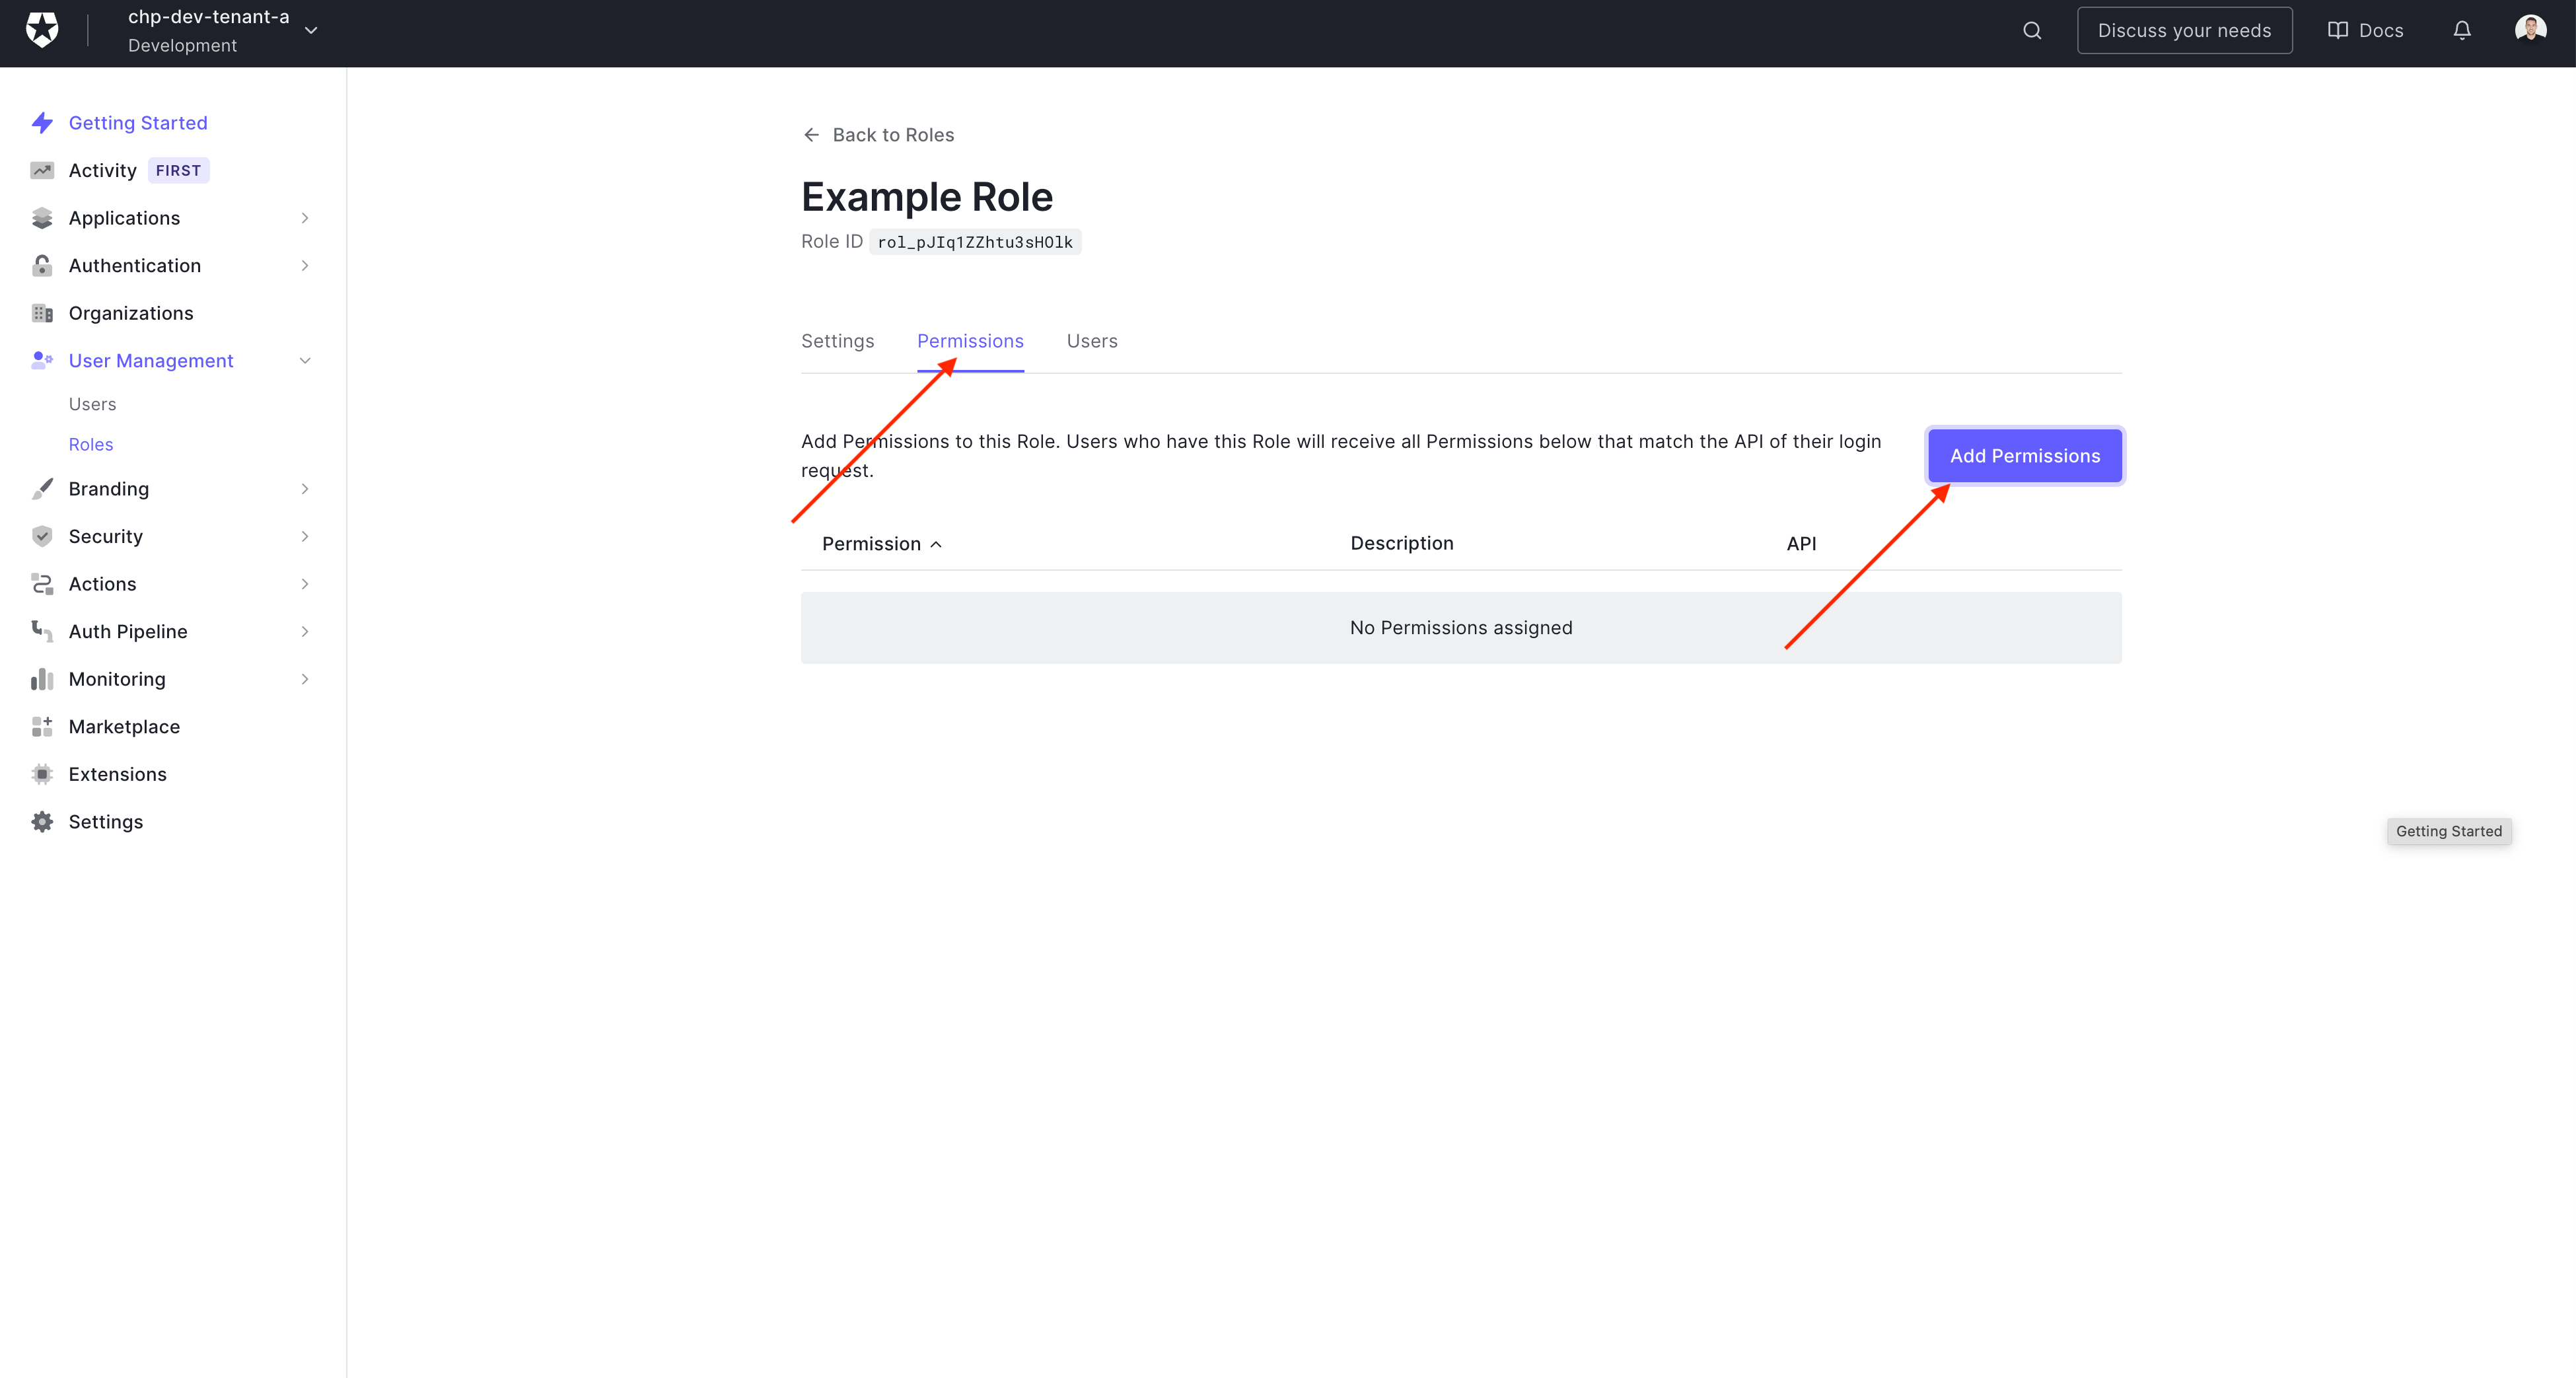
To assign a permission to a role (Go to the permissions tab and click 'Add Permissions')
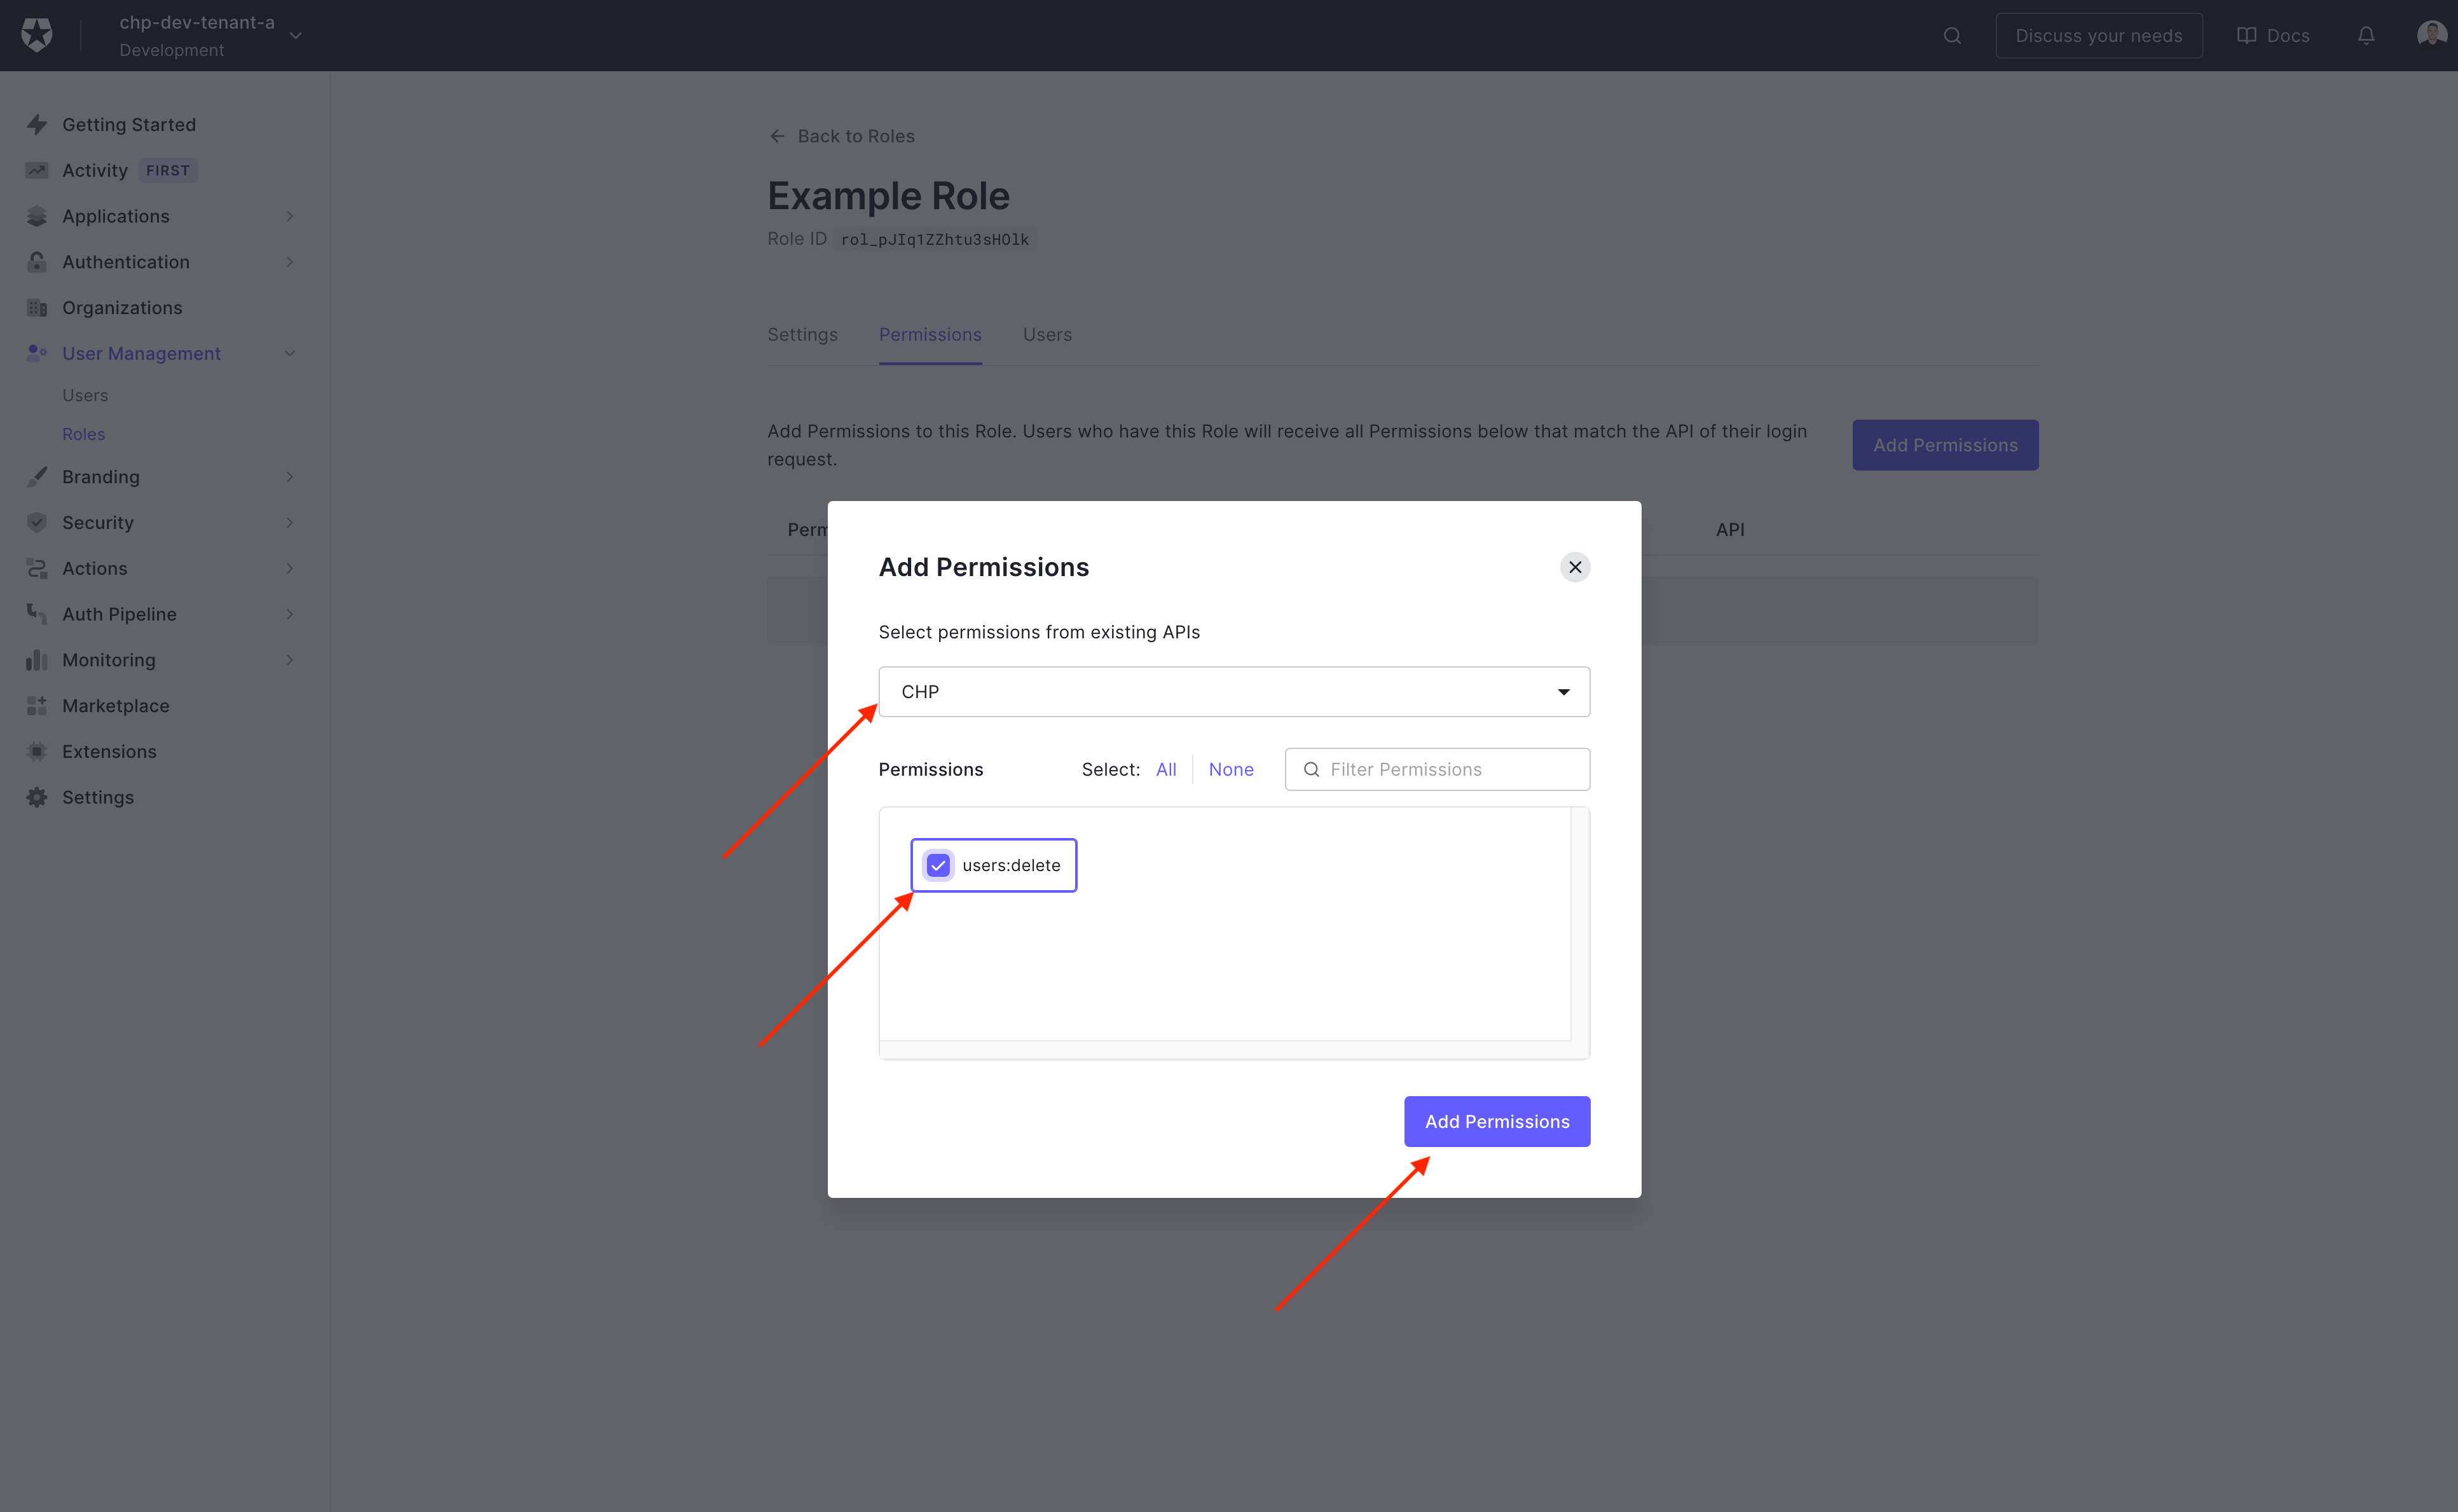
To find the permission select the API and check the box next to the permissions
Database Connection
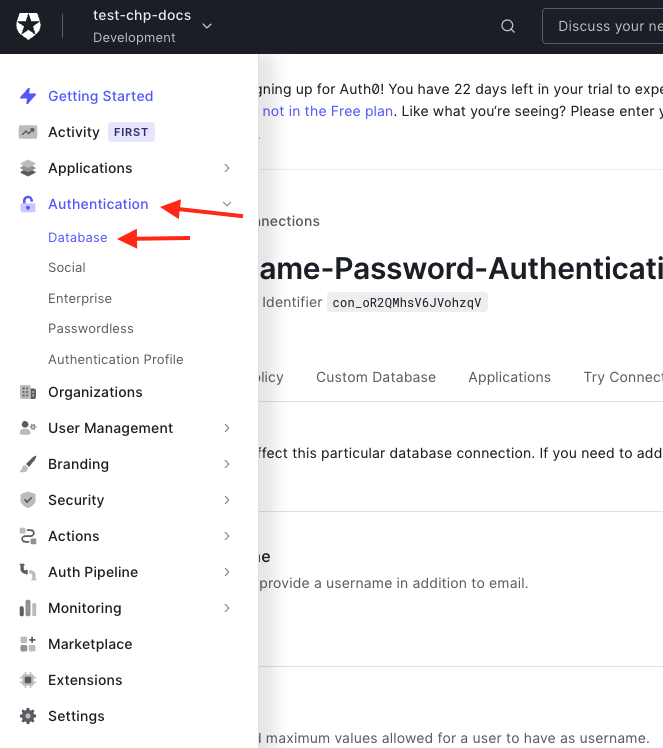
To start, navigate to Authentication > Database to configure the database connection.
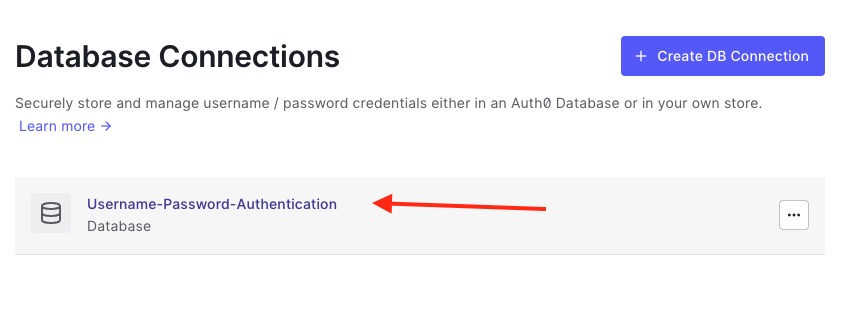
We'll use the default database connection that is established when the tenant is created, named Username-Password-Authentication.
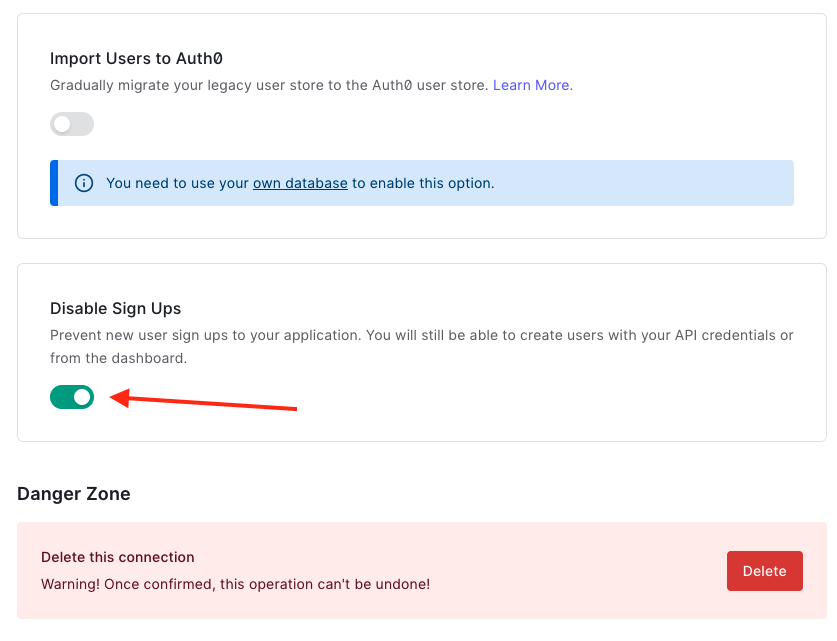
Disable Sign Up
Since CHP provides a Sign Up component, we can go ahead and disable the default Sign Up page provided by Auth0.
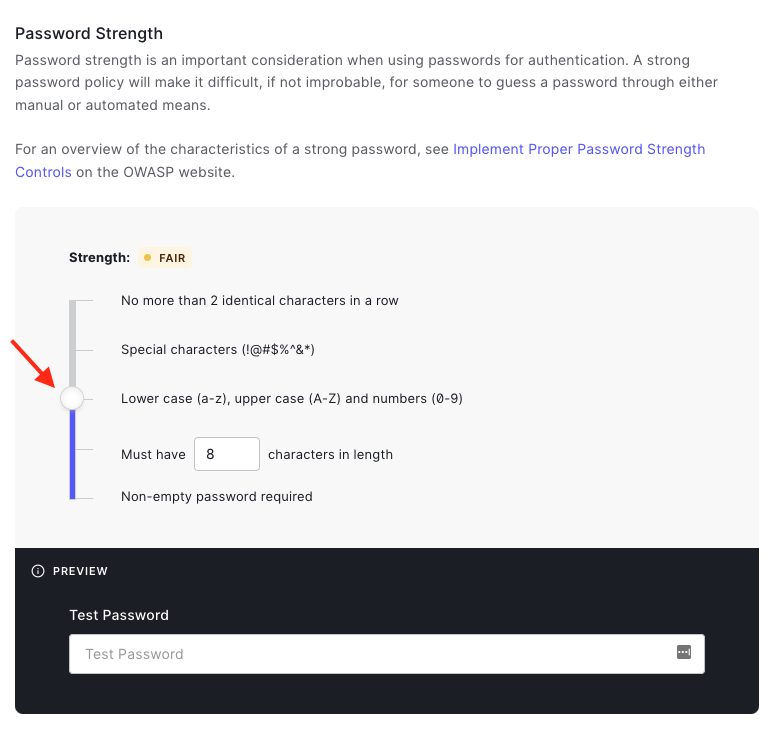
Password security
To ensure password security is at least fair, navigate to the Password Policy tab and set the Password Strength to fair. Also set the minimum length to 8.
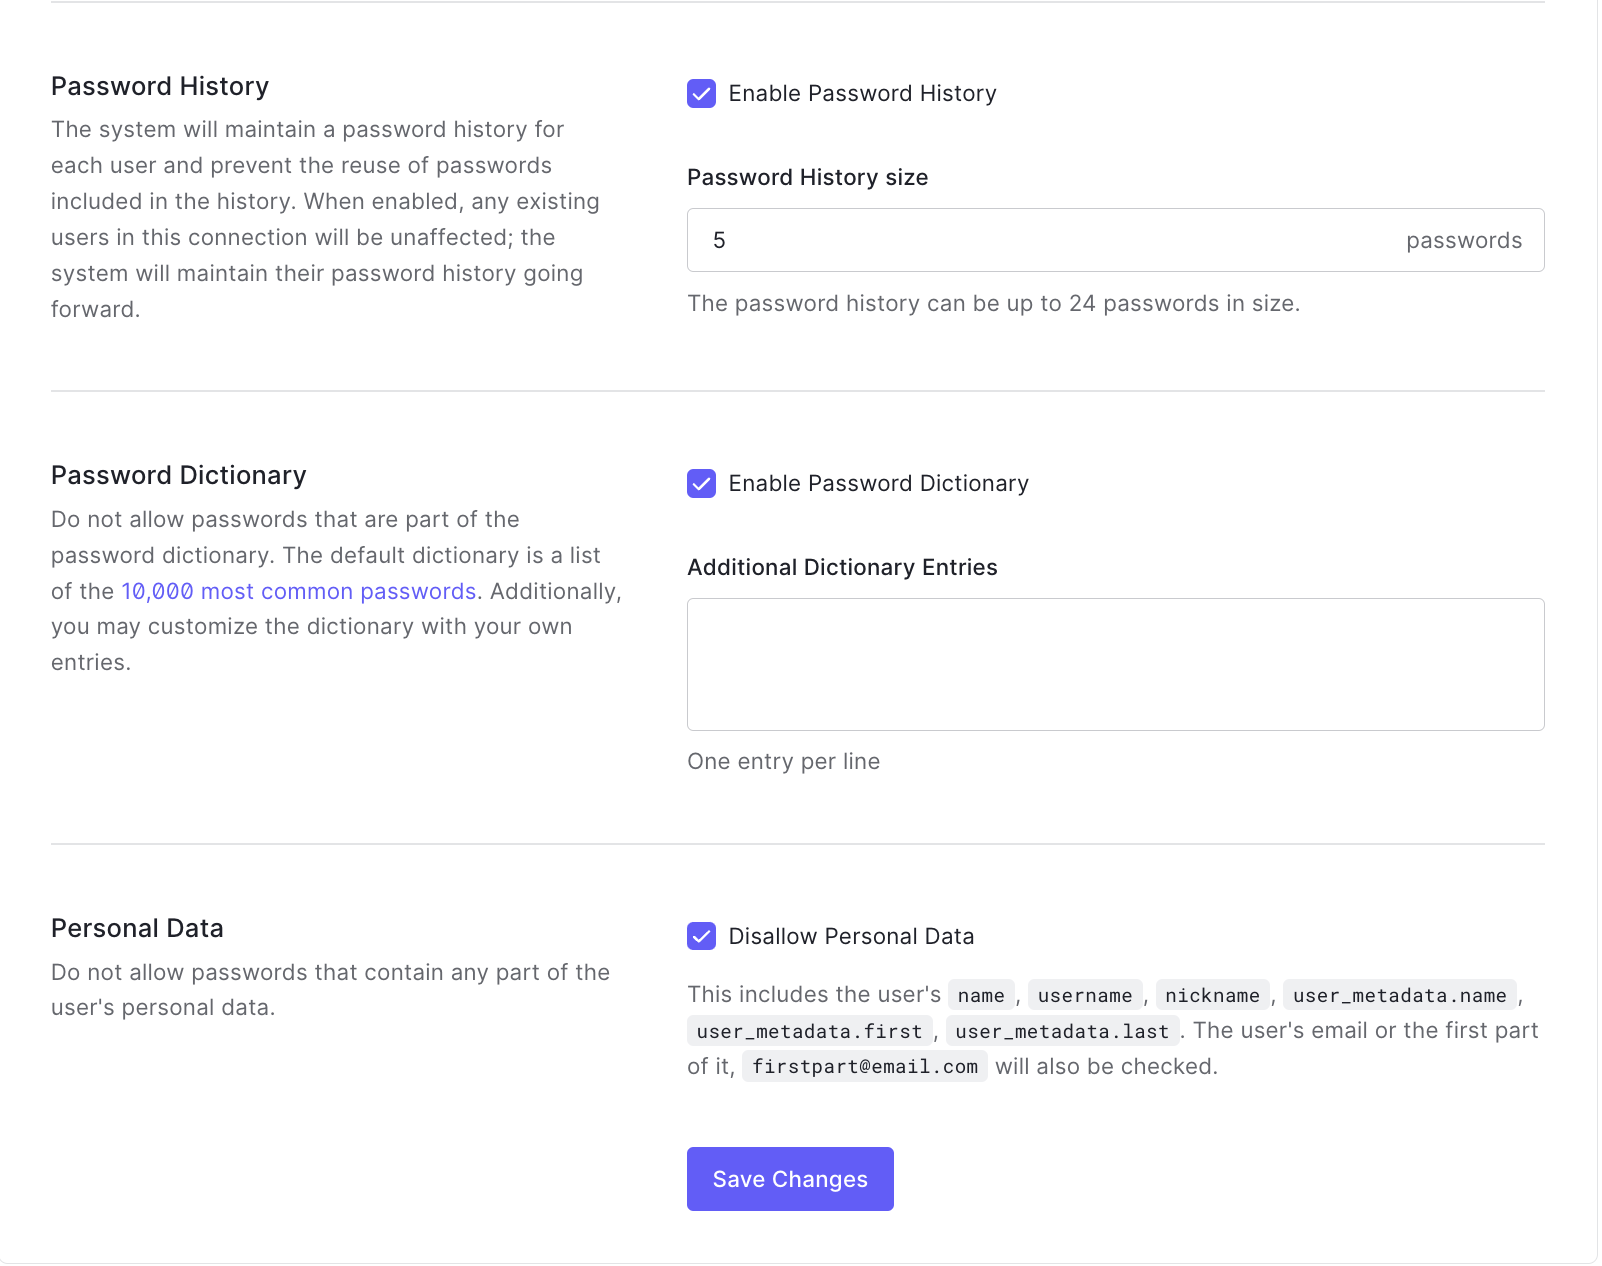
As per CHP policy, we'll also have to enable Password History, Password Dictionary and disallow Personal Data.
Make sure that Password History size is set to 5.
Security
Breached password detection
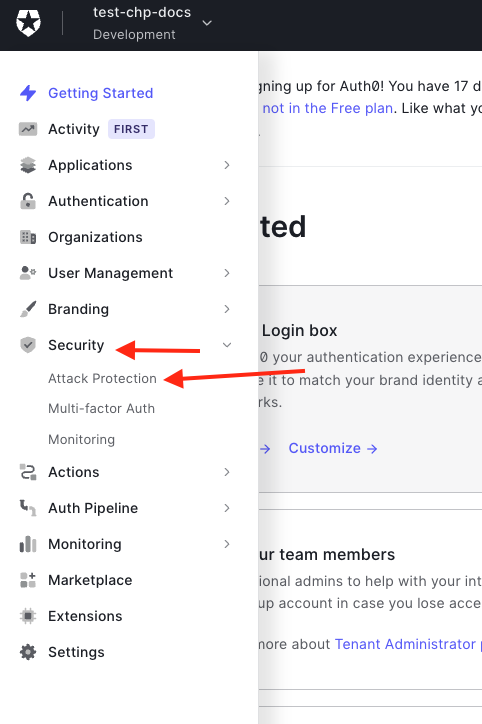
So that your application is protected from bad actors logging in with stolen credentials, we recommend that you enable and configure the Breached Password Detection. This can be done by navigating to Security > Attack Protection.
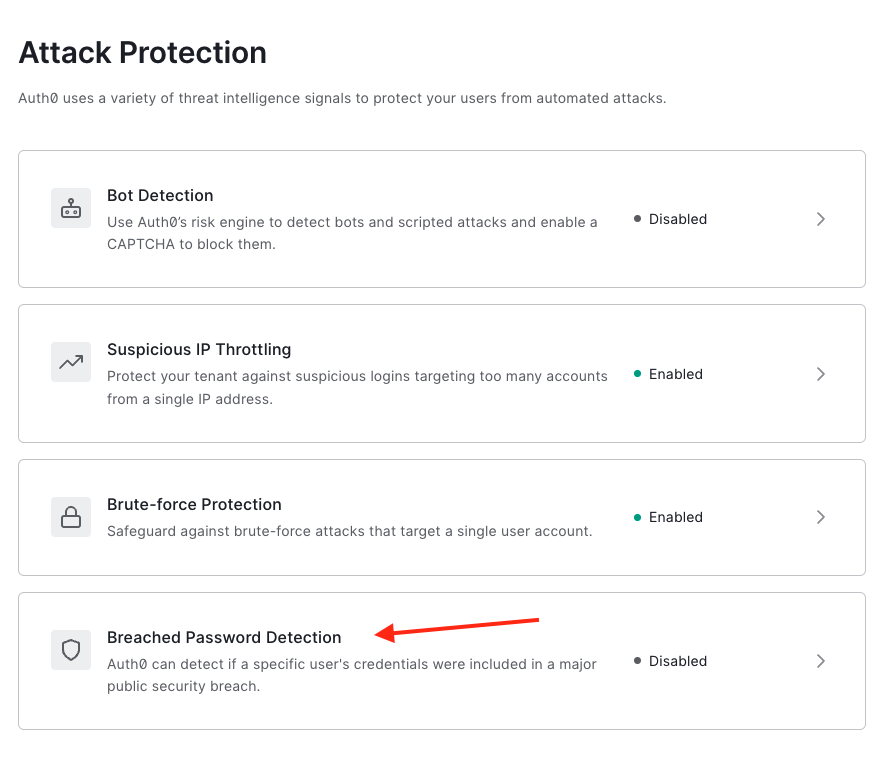
Select Breached Password Detection from the list.
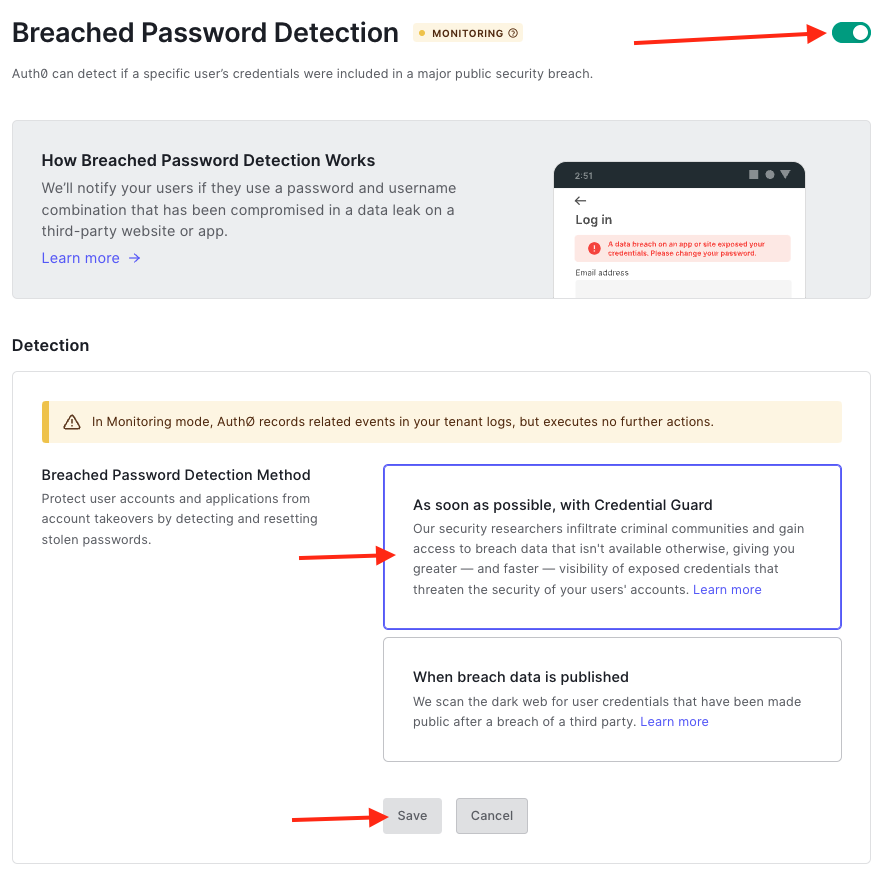
Enable Breached Password Detection and select As soon as possible, with Credential Guard then click Save.
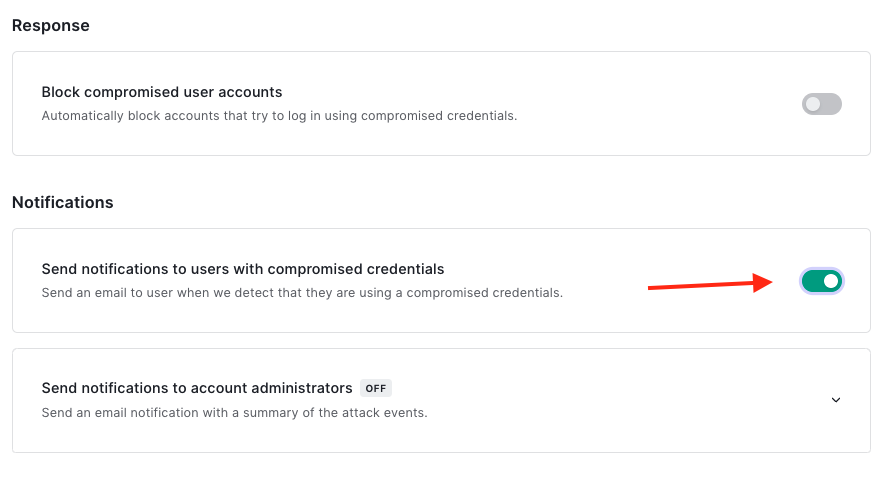
Additionally, we will need to enable sending notifications to users.
CAPTCHA
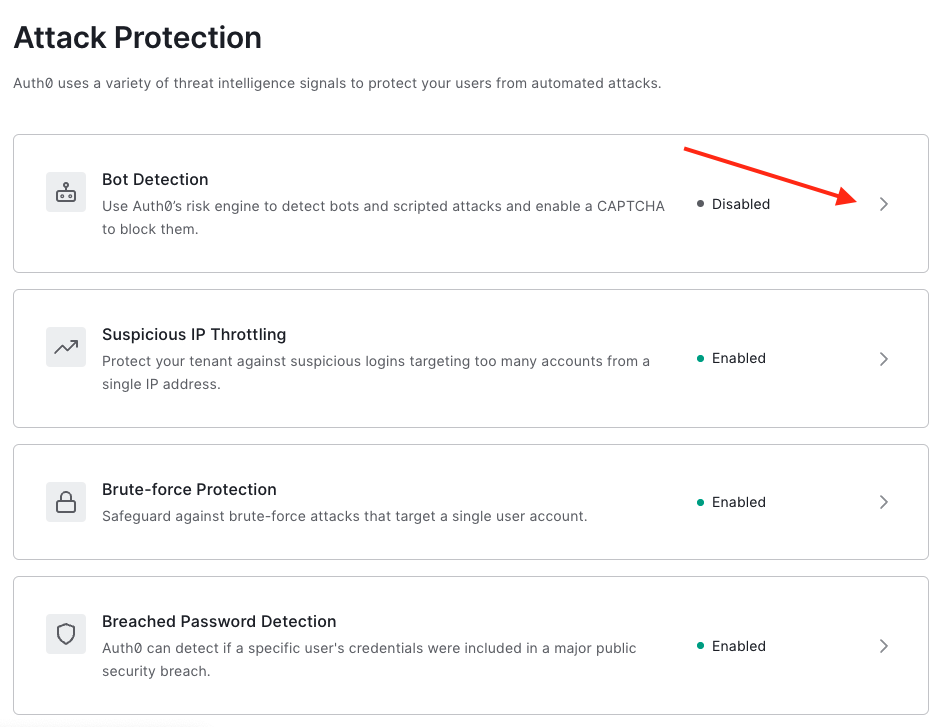
Back on the Attack Protection page, select Bot Detection.
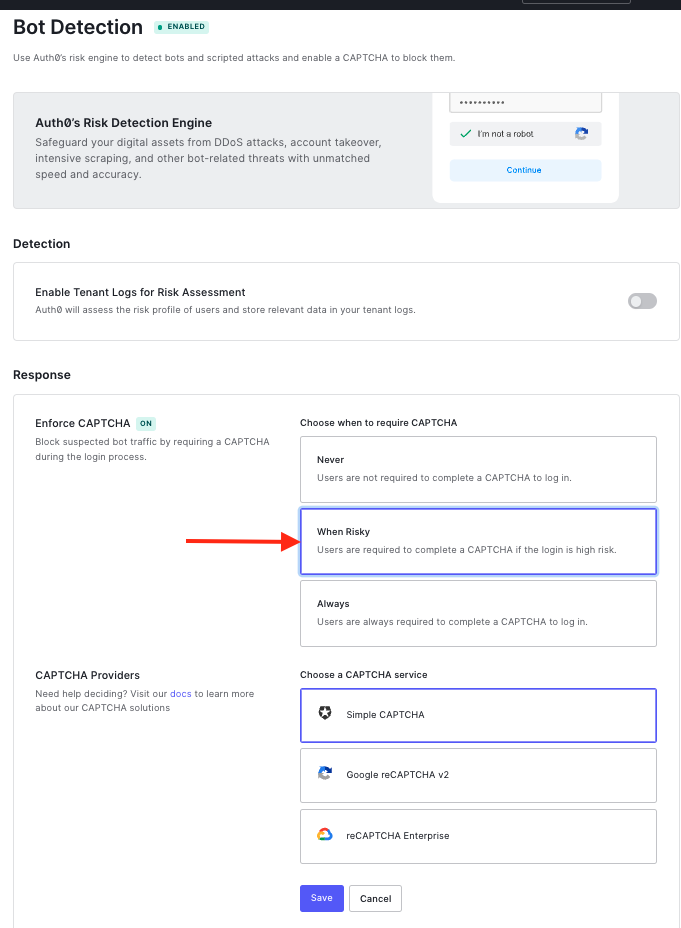
Choose When Risky and the provider you want to use CAPTCHA from.
MFA
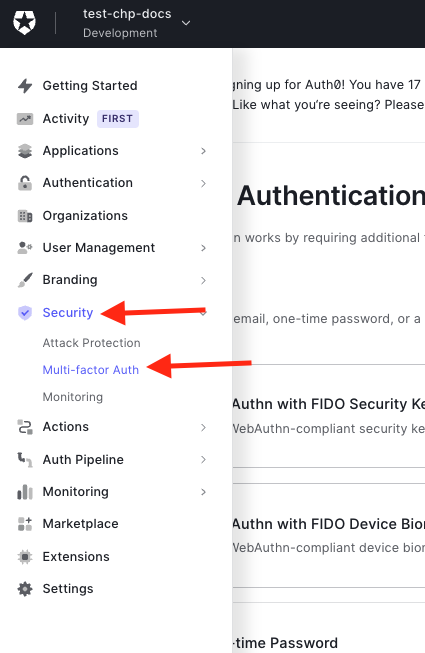
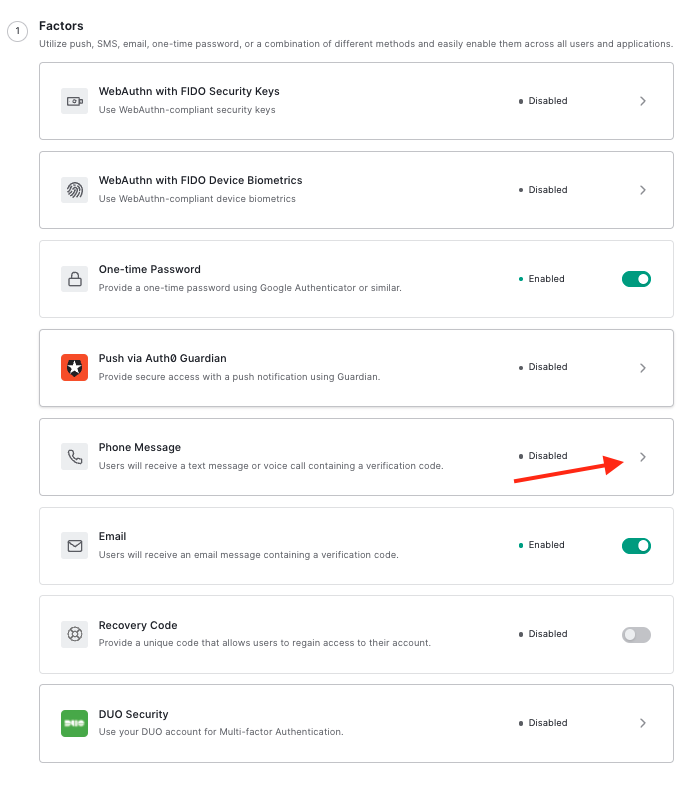
Multi-factor authentication (MFA) is a part of our security policy. To enable it, navigate to Security > Multi-factor Auth.
MFA Text & Voice
You'll want to enable the Text & Voice options, too. Select Phone Message to do this.
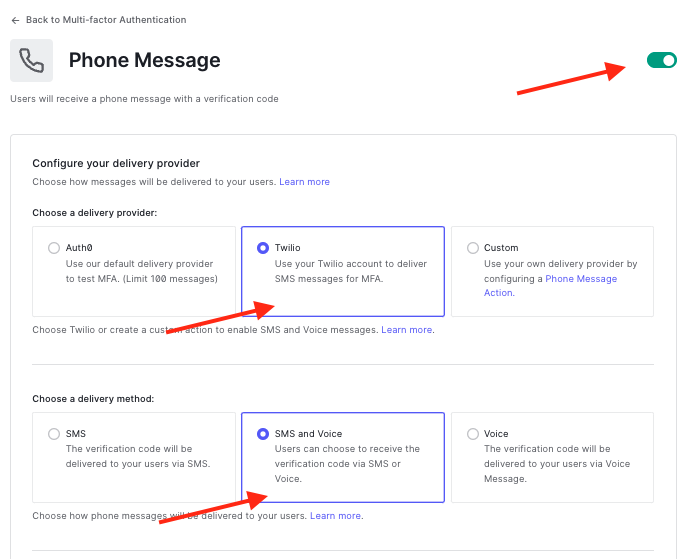
Enable the Phone Message option and then select Twilio as the provider and SMS and Voice as the delivery method.
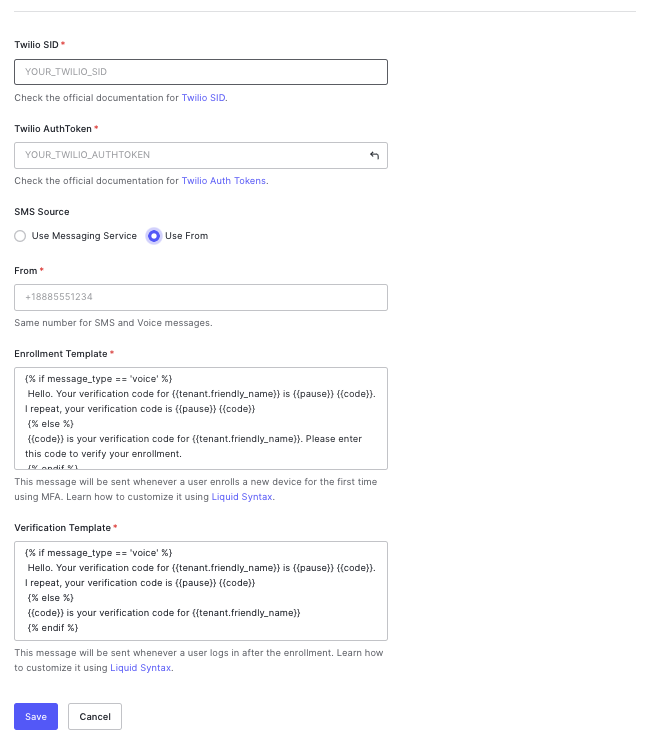
A Twilio account is required for the SMS and Voice MFA option to work. Fill in your Twilio account details here.
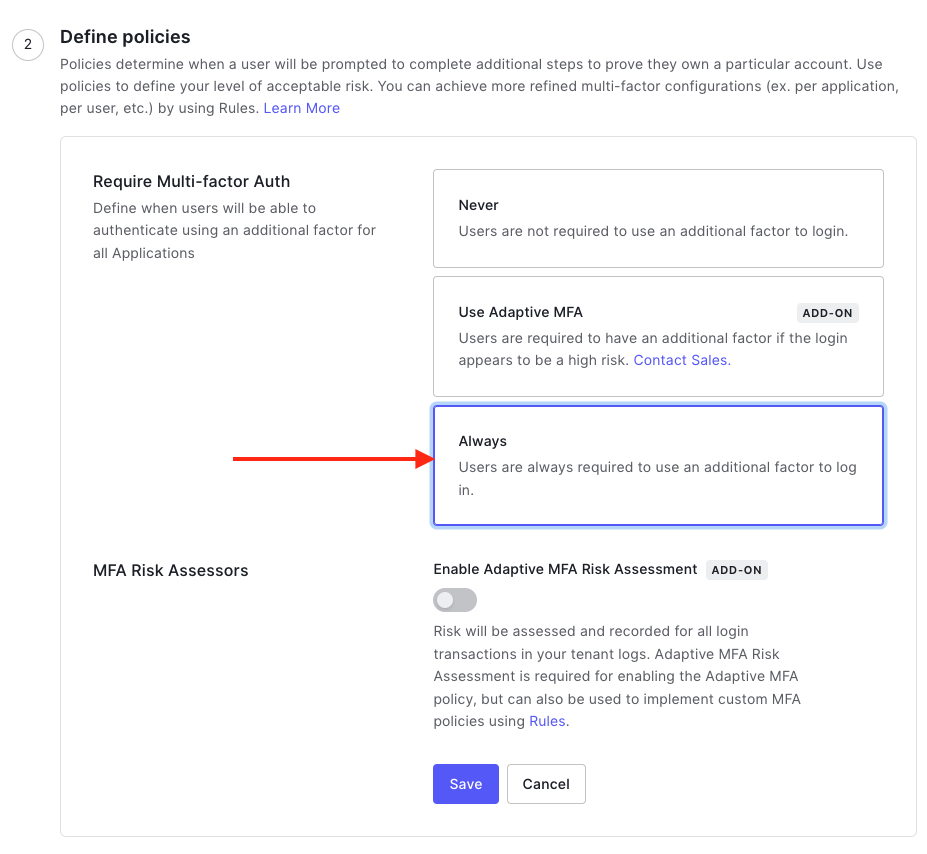
MFA Policies
CHP's recommendation is to always have MFA enabled (like in the image below).
Customization
Universal Login
Next up is configuring the Universal Login. Navigate to Branding > Universal Login.
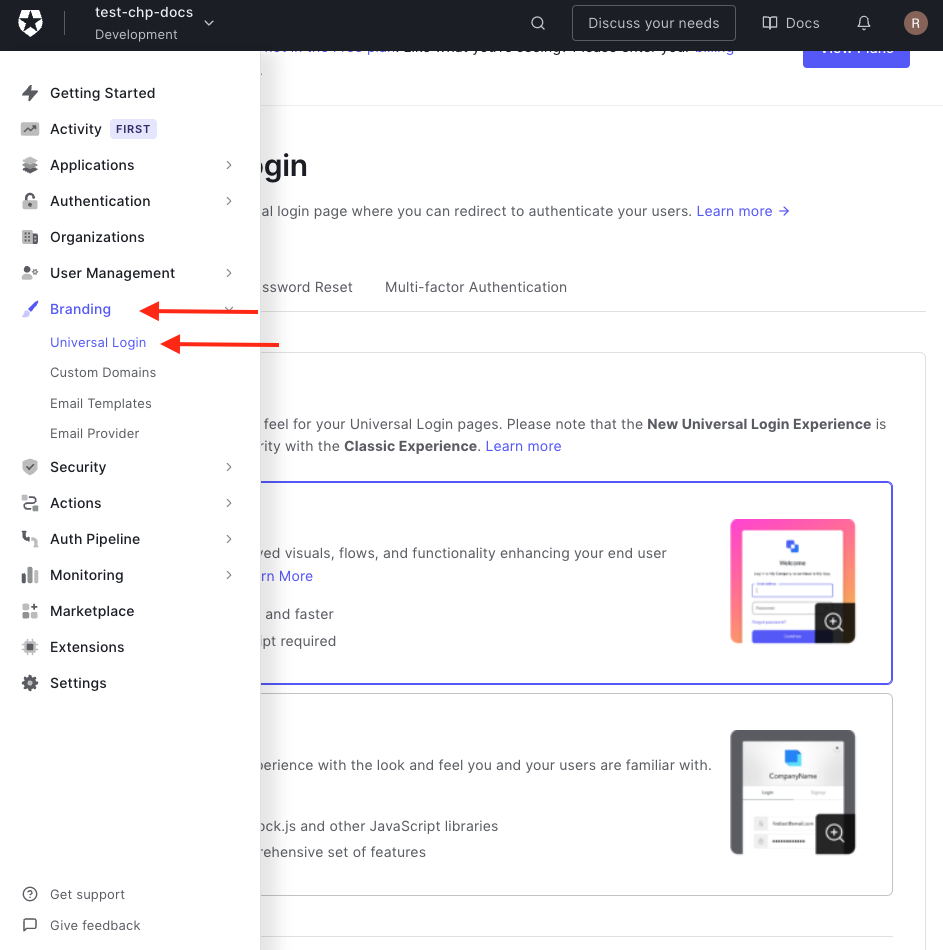
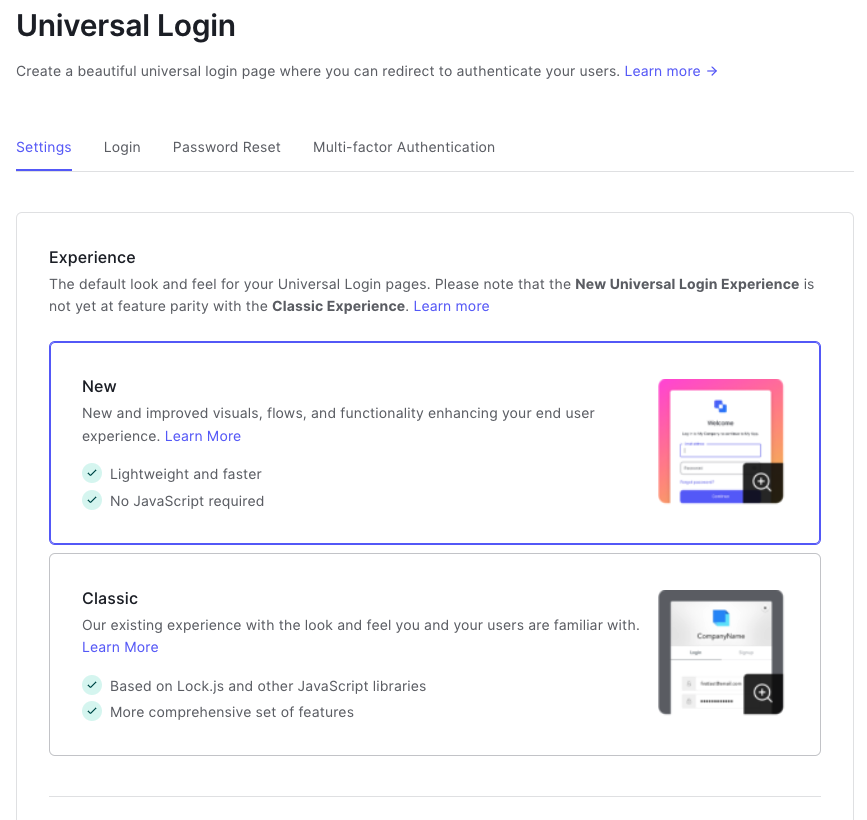
Auth0 has 2 types of Universal Login: New and Classic. CHP works with the New experience.
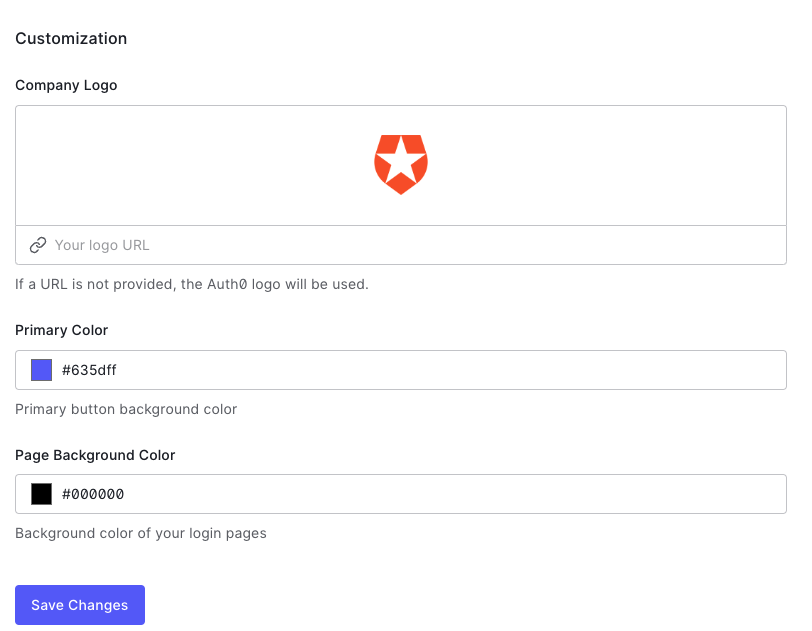
You can change the logo displayed on the Sign In page, and you also have the option to edit primary and secondary colors.
New Universal Login forms customization
Optionally, you can further customise the template used for the New Universal Login by following the steps in this section.
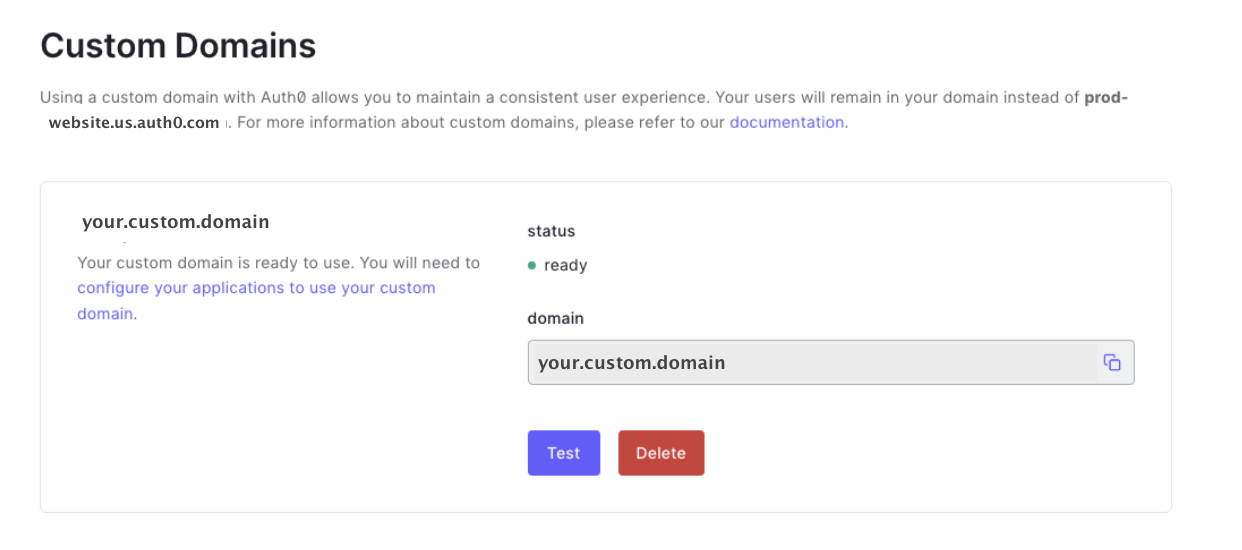
Enabling custom domains
First, you will need to create a custom domain. This is a paid feature, so make sure you upgrade your account to any paid plan before moving to the next step.
You can configure a custom domain on the Auth0 Dashboard > Branding > Custom Domains tab in the Auth0 Dashboard.
Add and approve your custom domain following the instructions provided by Auth0.
Configuring the New Universal Login forms
To configure the New Universal Login forms there is an Auth0 CLI command to do this. By running:
auth0 branding templates update
Will provide 3 template options which are Auth0 base templates to build from:
- Basic
- Login box + image
- Page footers
After selecting a template option it will open your default code editor (Setting VSCode as your default editor), and a Storybook window in your browser, previewing the current state of your universal screens.
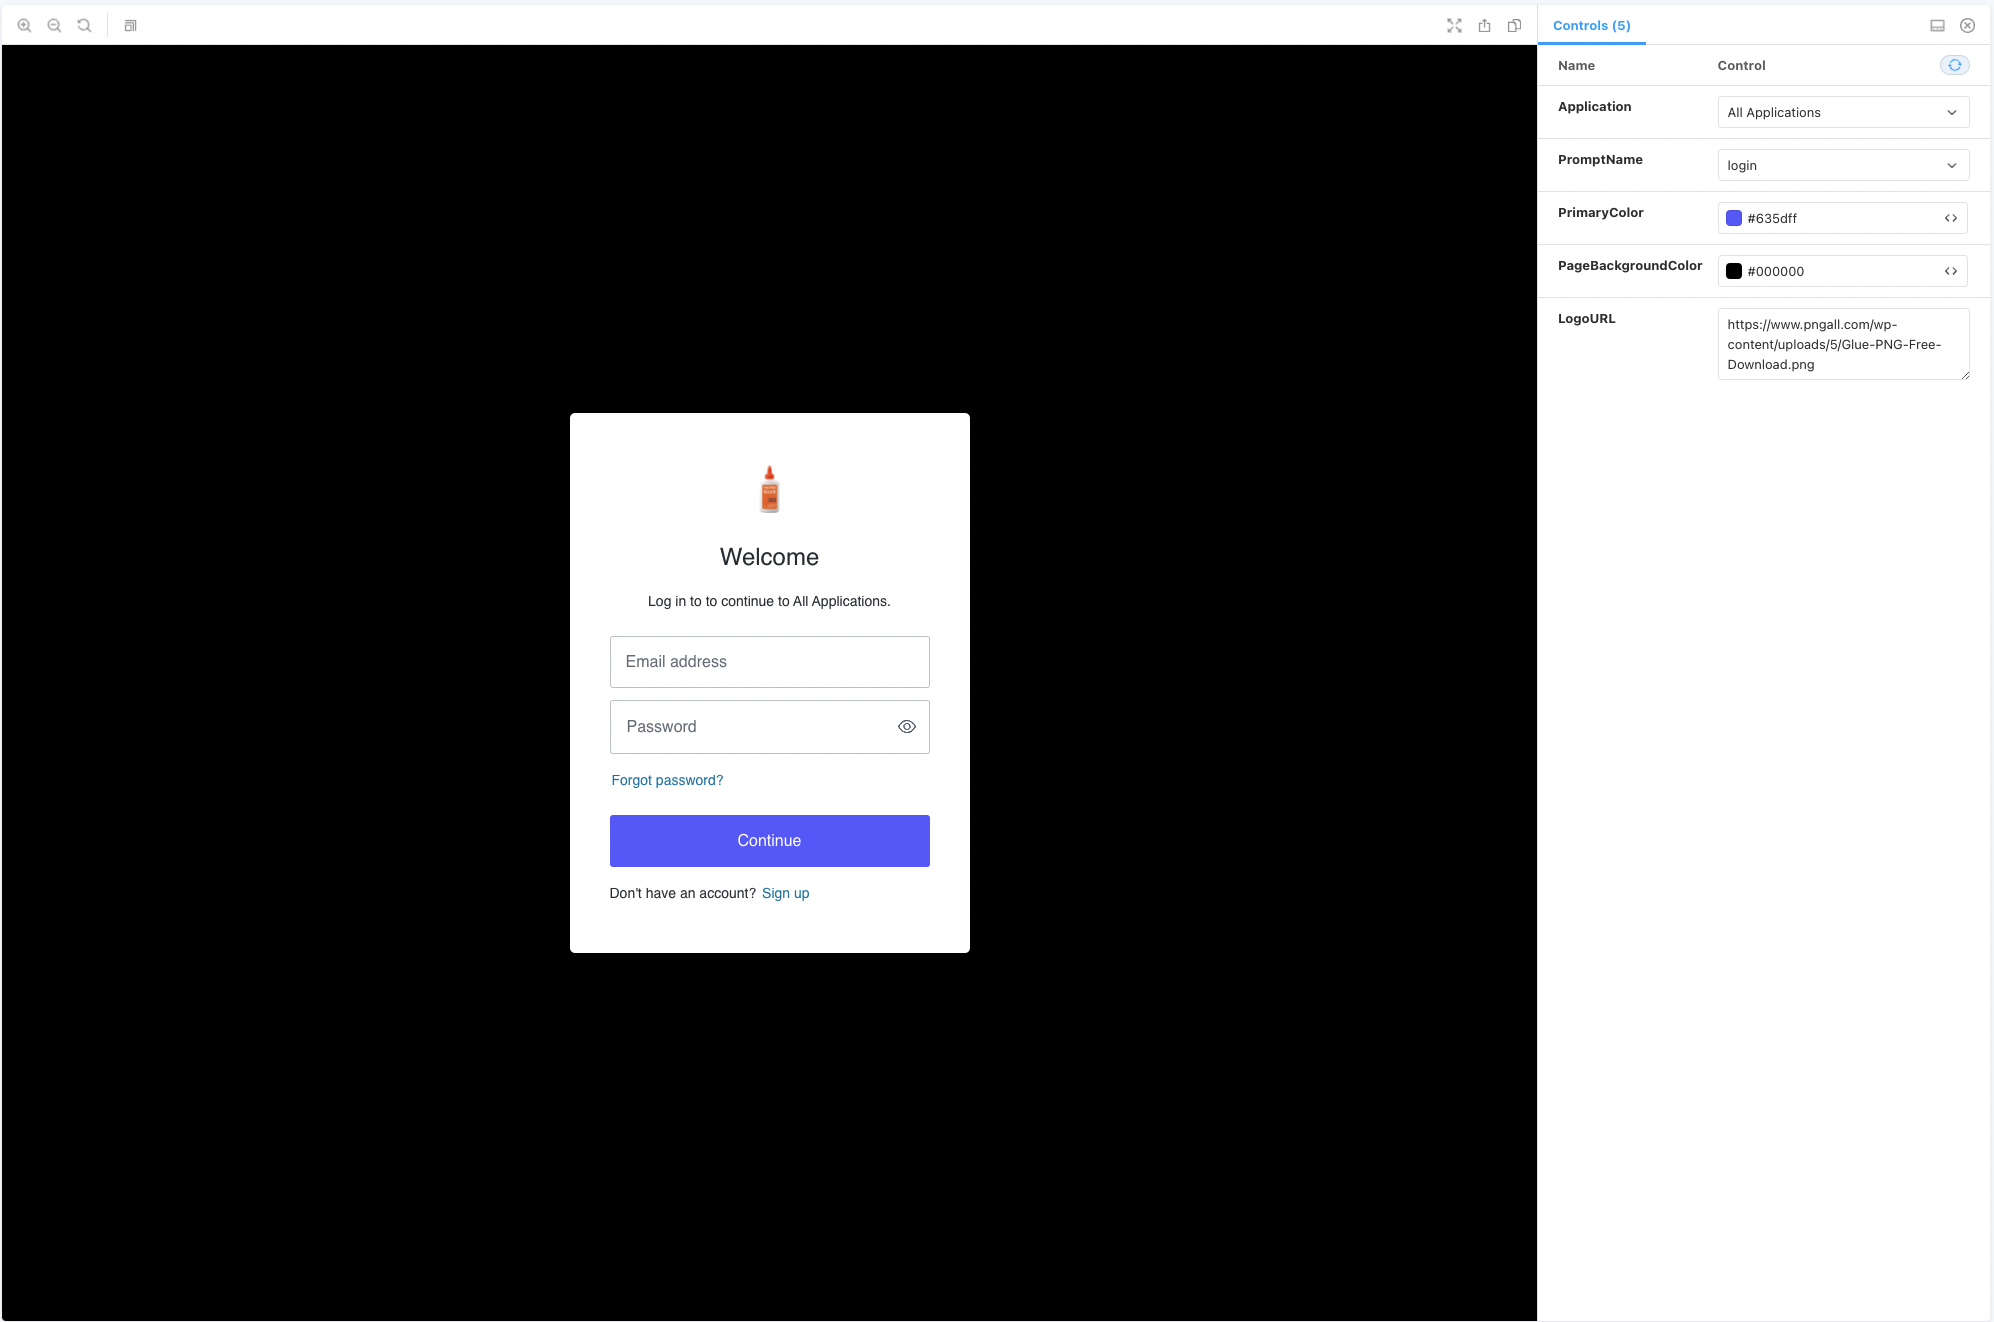
Remember to add {%- auth0:head -%} in the HTML head tag
and {%- auth0:widget -%} where you want the Auth0 widget to be injected.
This is an example of a basic template that displays the Auth0 login:
<!DOCTYPE html>
<html>
  <head>
    {%- auth0:head -%}
  </head>
  <body>
    {%- auth0:widget -%}
  </body>
</html>
When you close the editor, Auth0 CLI will ask you if you want to update the login template.

Email Customization
There are a couple of email templates that need to be customized. To do this, navigate to Branding > Email Templates.
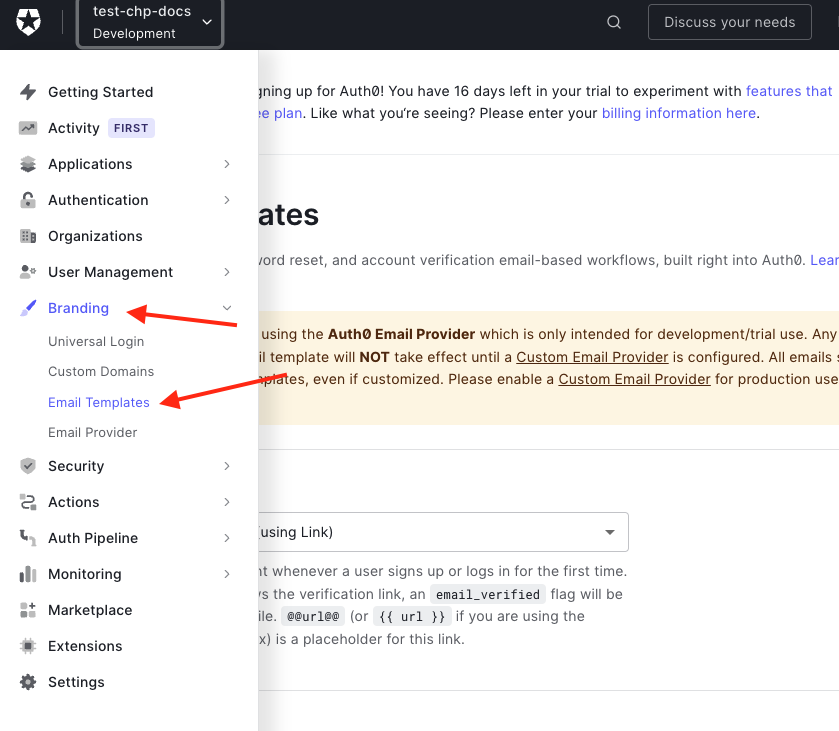
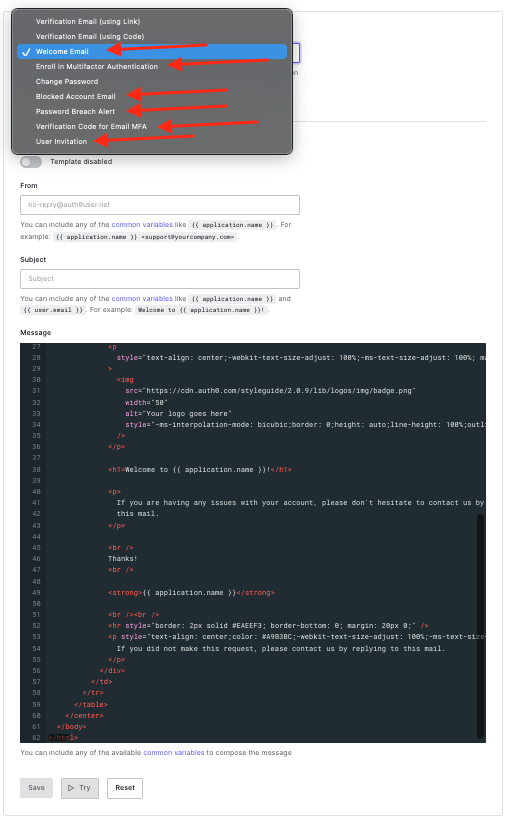
The templates you'll want to modify are:
- Welcome Email
- Enroll in Multi-factor Authentication
- Blocked Account Email (sent if you disable an account based on
Breached Password Detection) - Password Breach Alert (sent if
Breached Password Detectiondetects a breach) - Verification Code for Email MFA
- User Invitation (sent if there is no self service Sign Up and users are invited instead)
Using the Auth0 SDK
You can find out how to verify user status in a React app and use Sign In and Sign Out functionality in the Auth0 documentation. It explains how to properly configure the Single Page Web App and how to retrieve the credentials needed for configuring the Auth0 SDK.